Easy Remote Access Installation
"NOTE: The add-on currently only supports installation on HAOS."
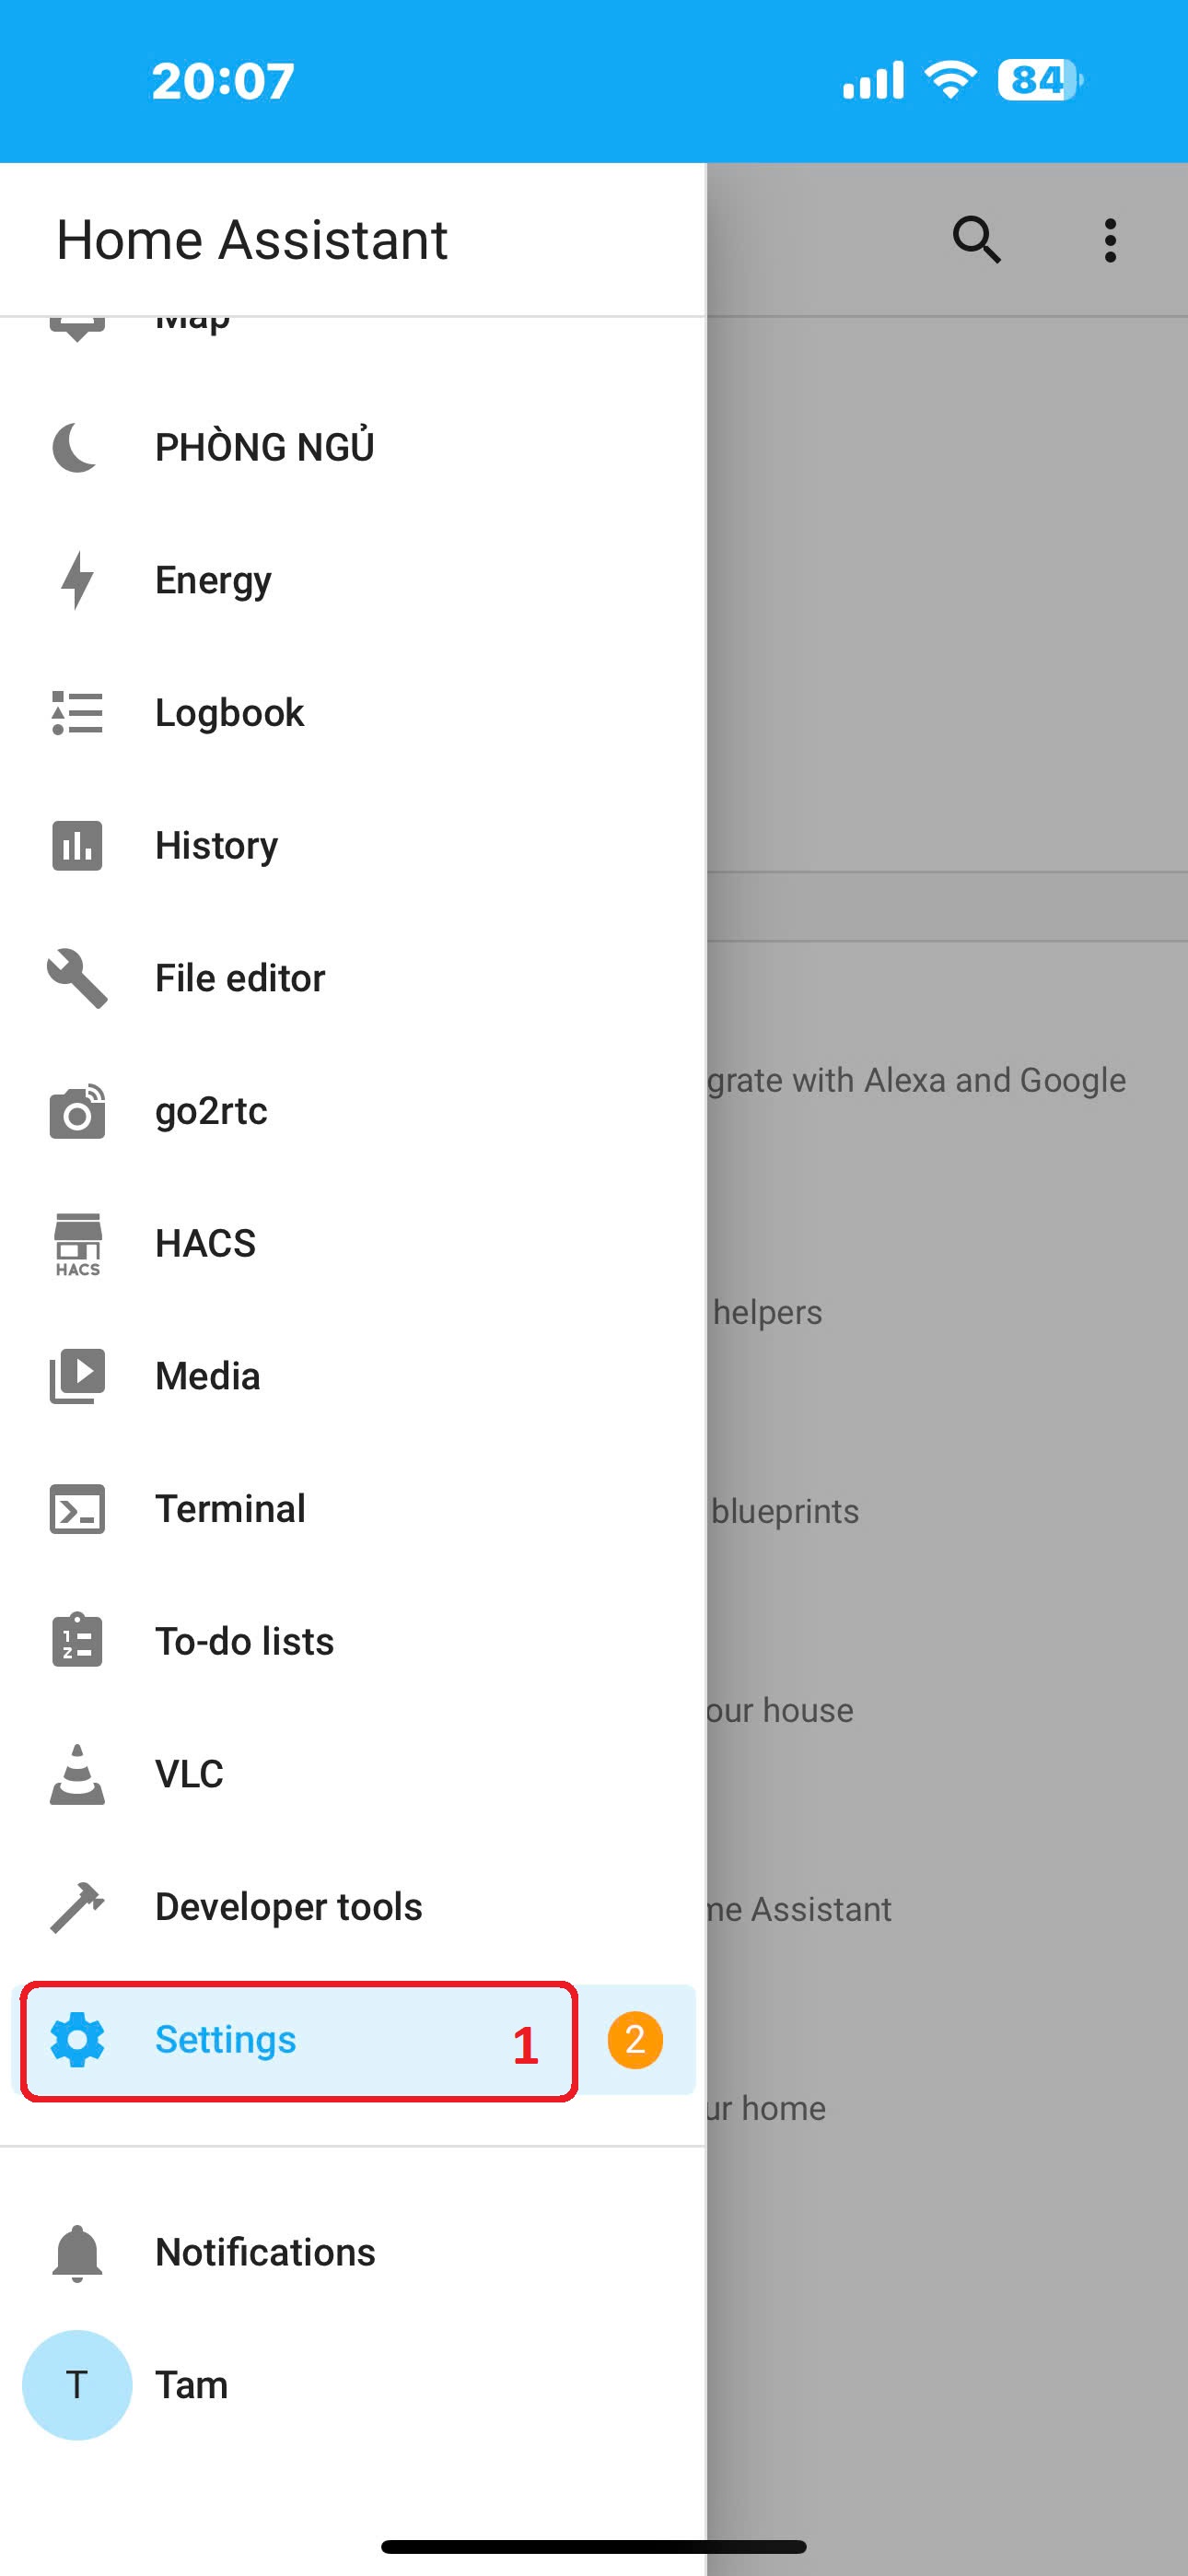
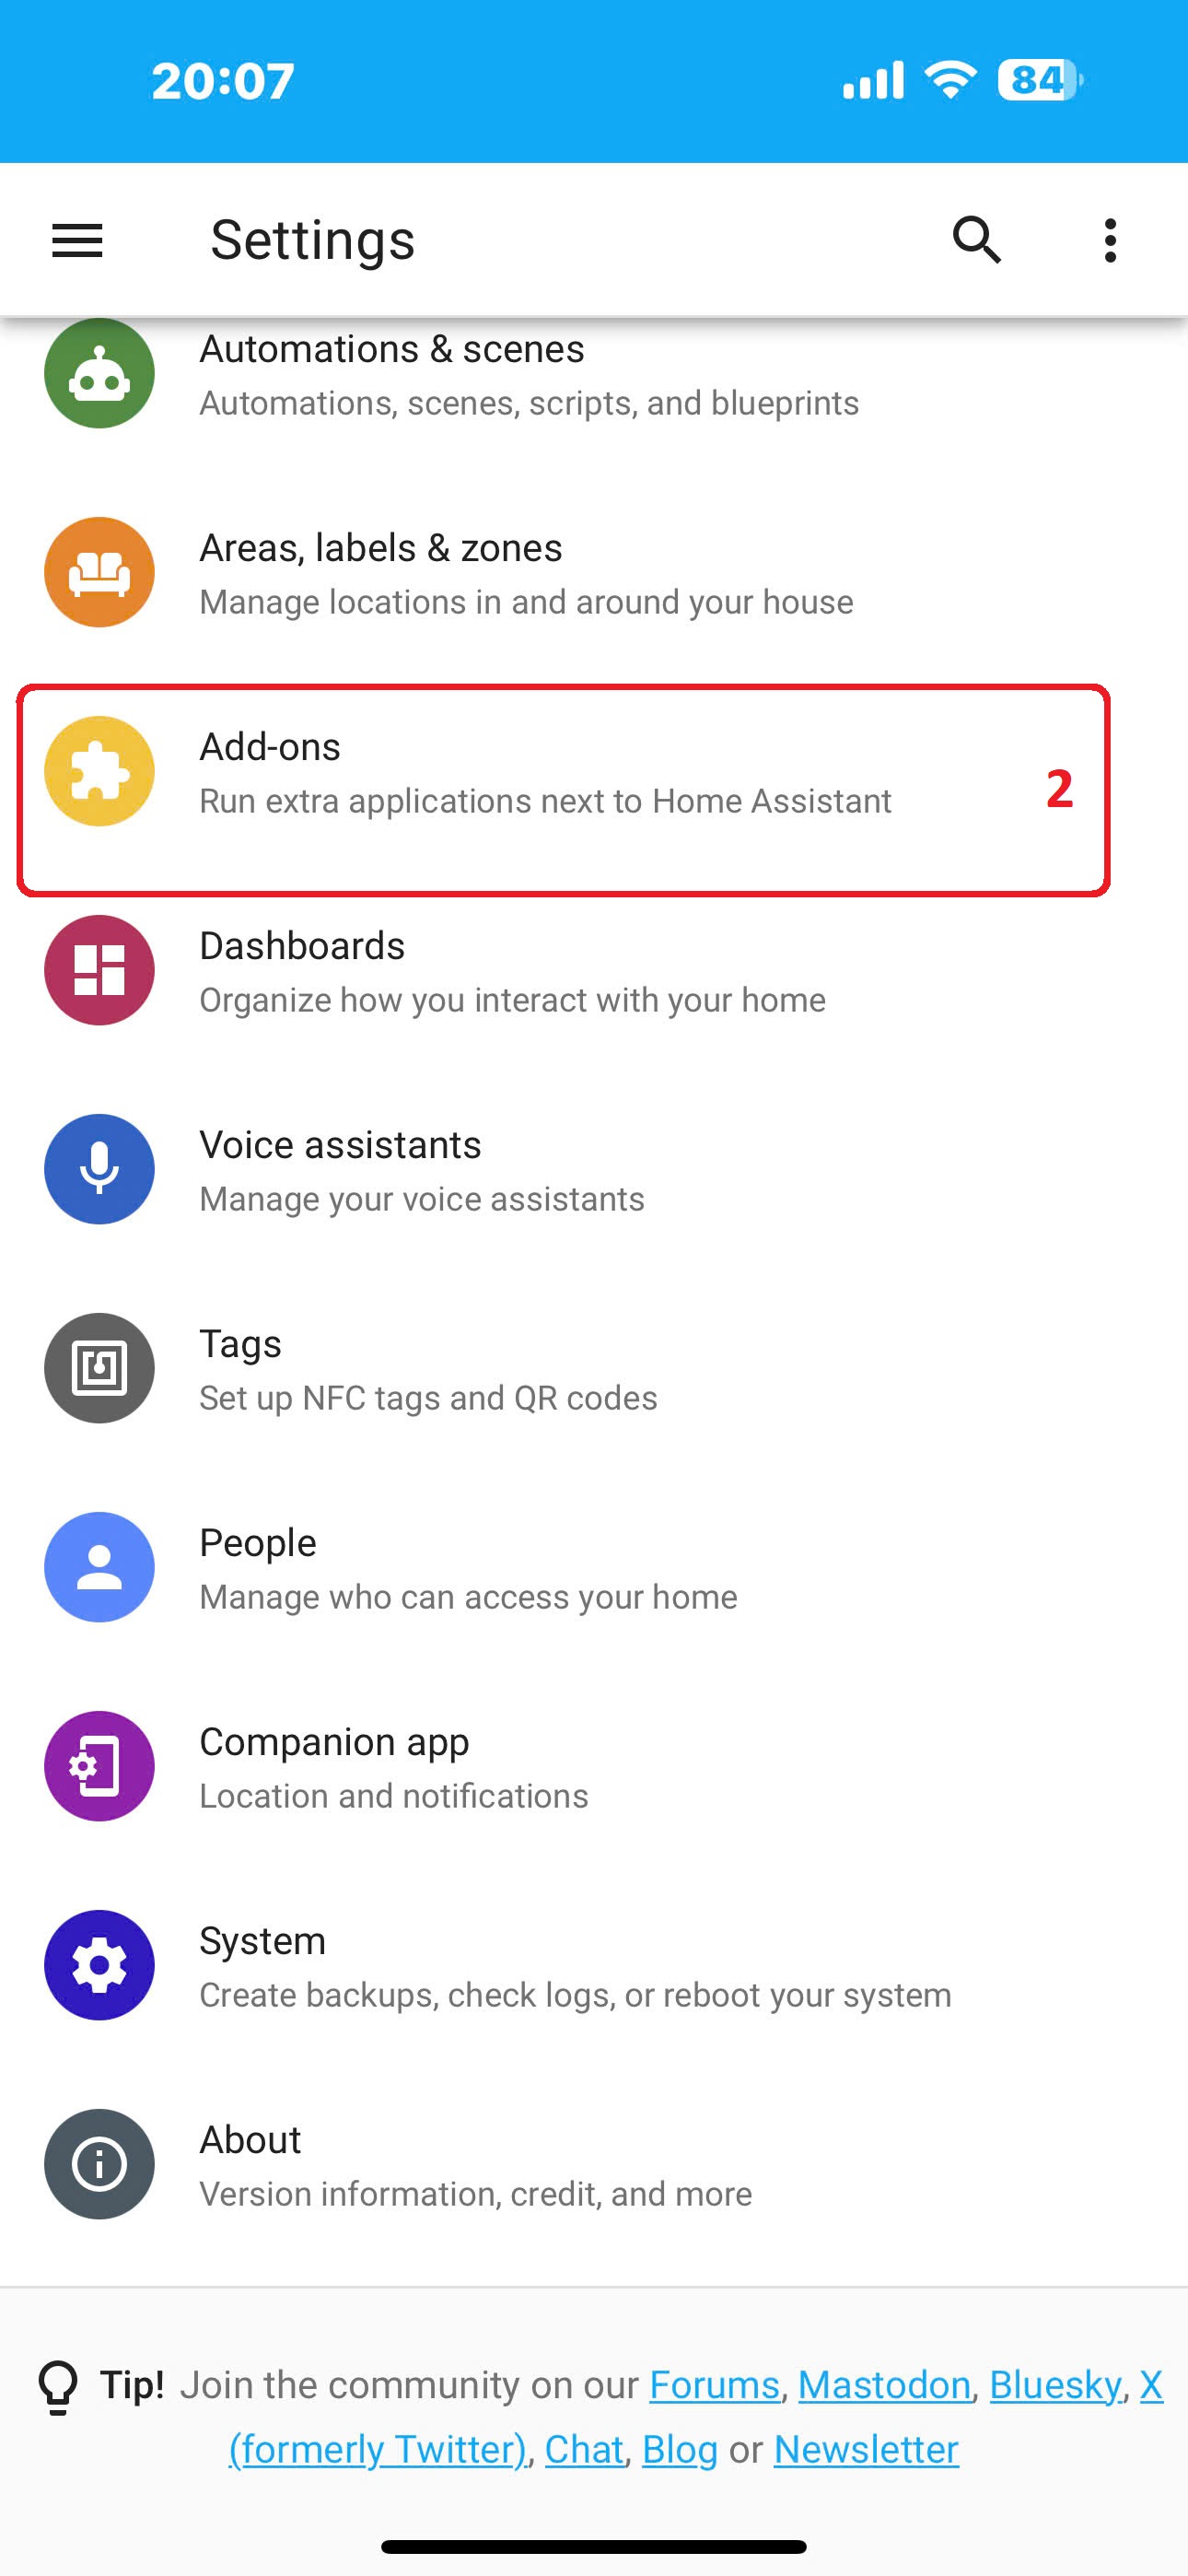
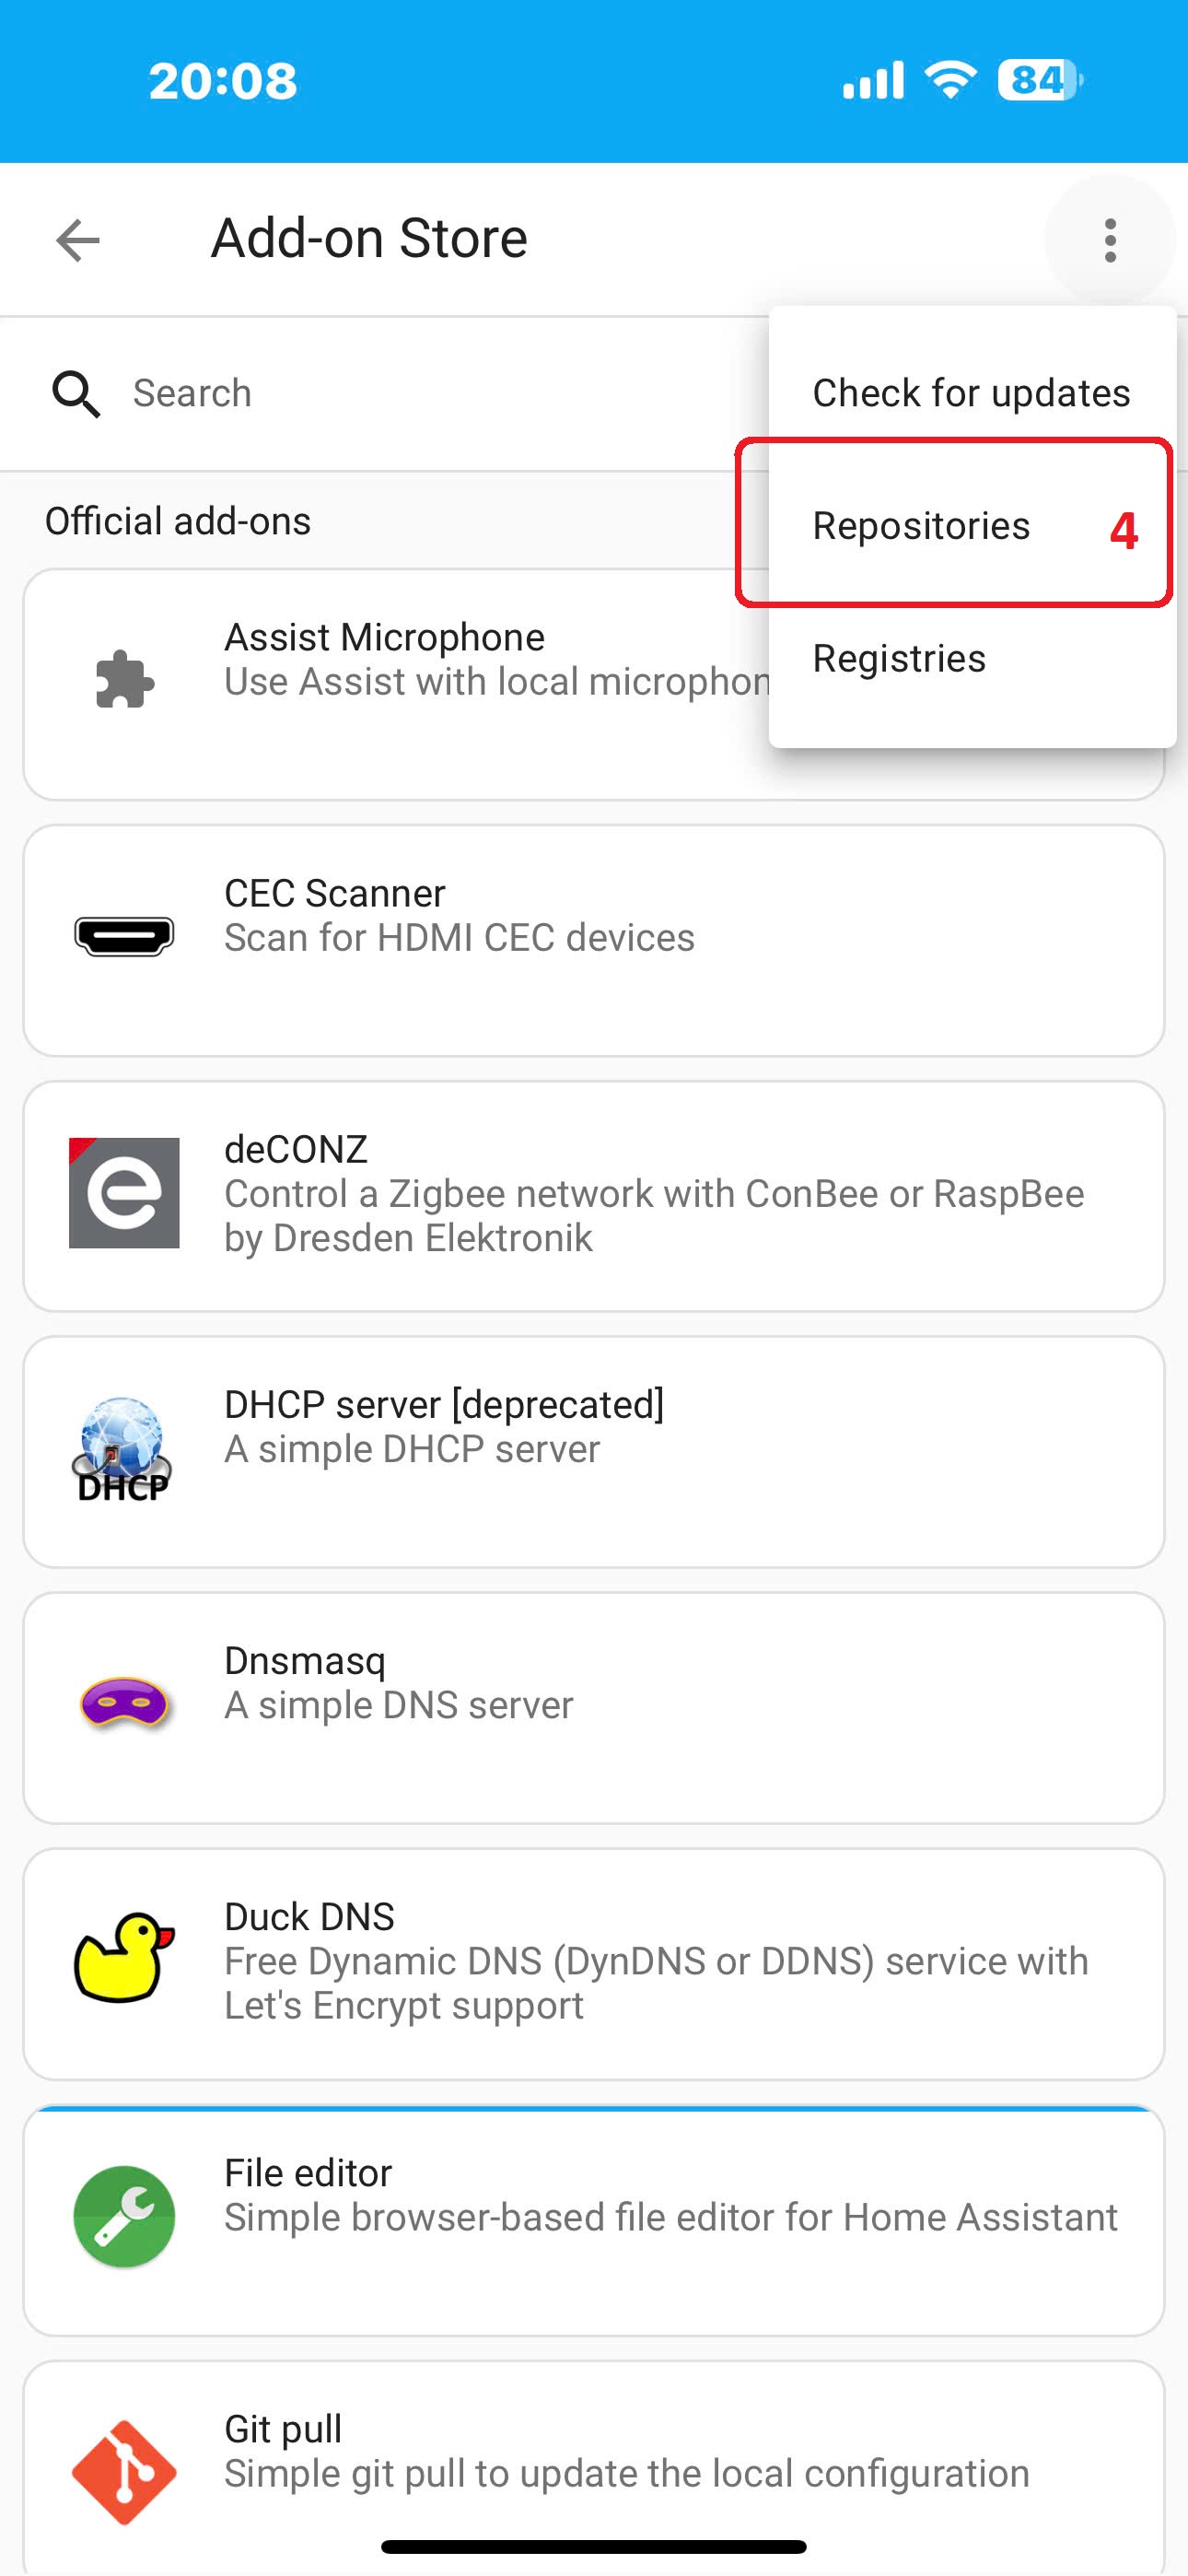
STEP_1. Open Home Assistant and go to the following menu: Settings -> Add-ons -> Add-on Store -> Repositories

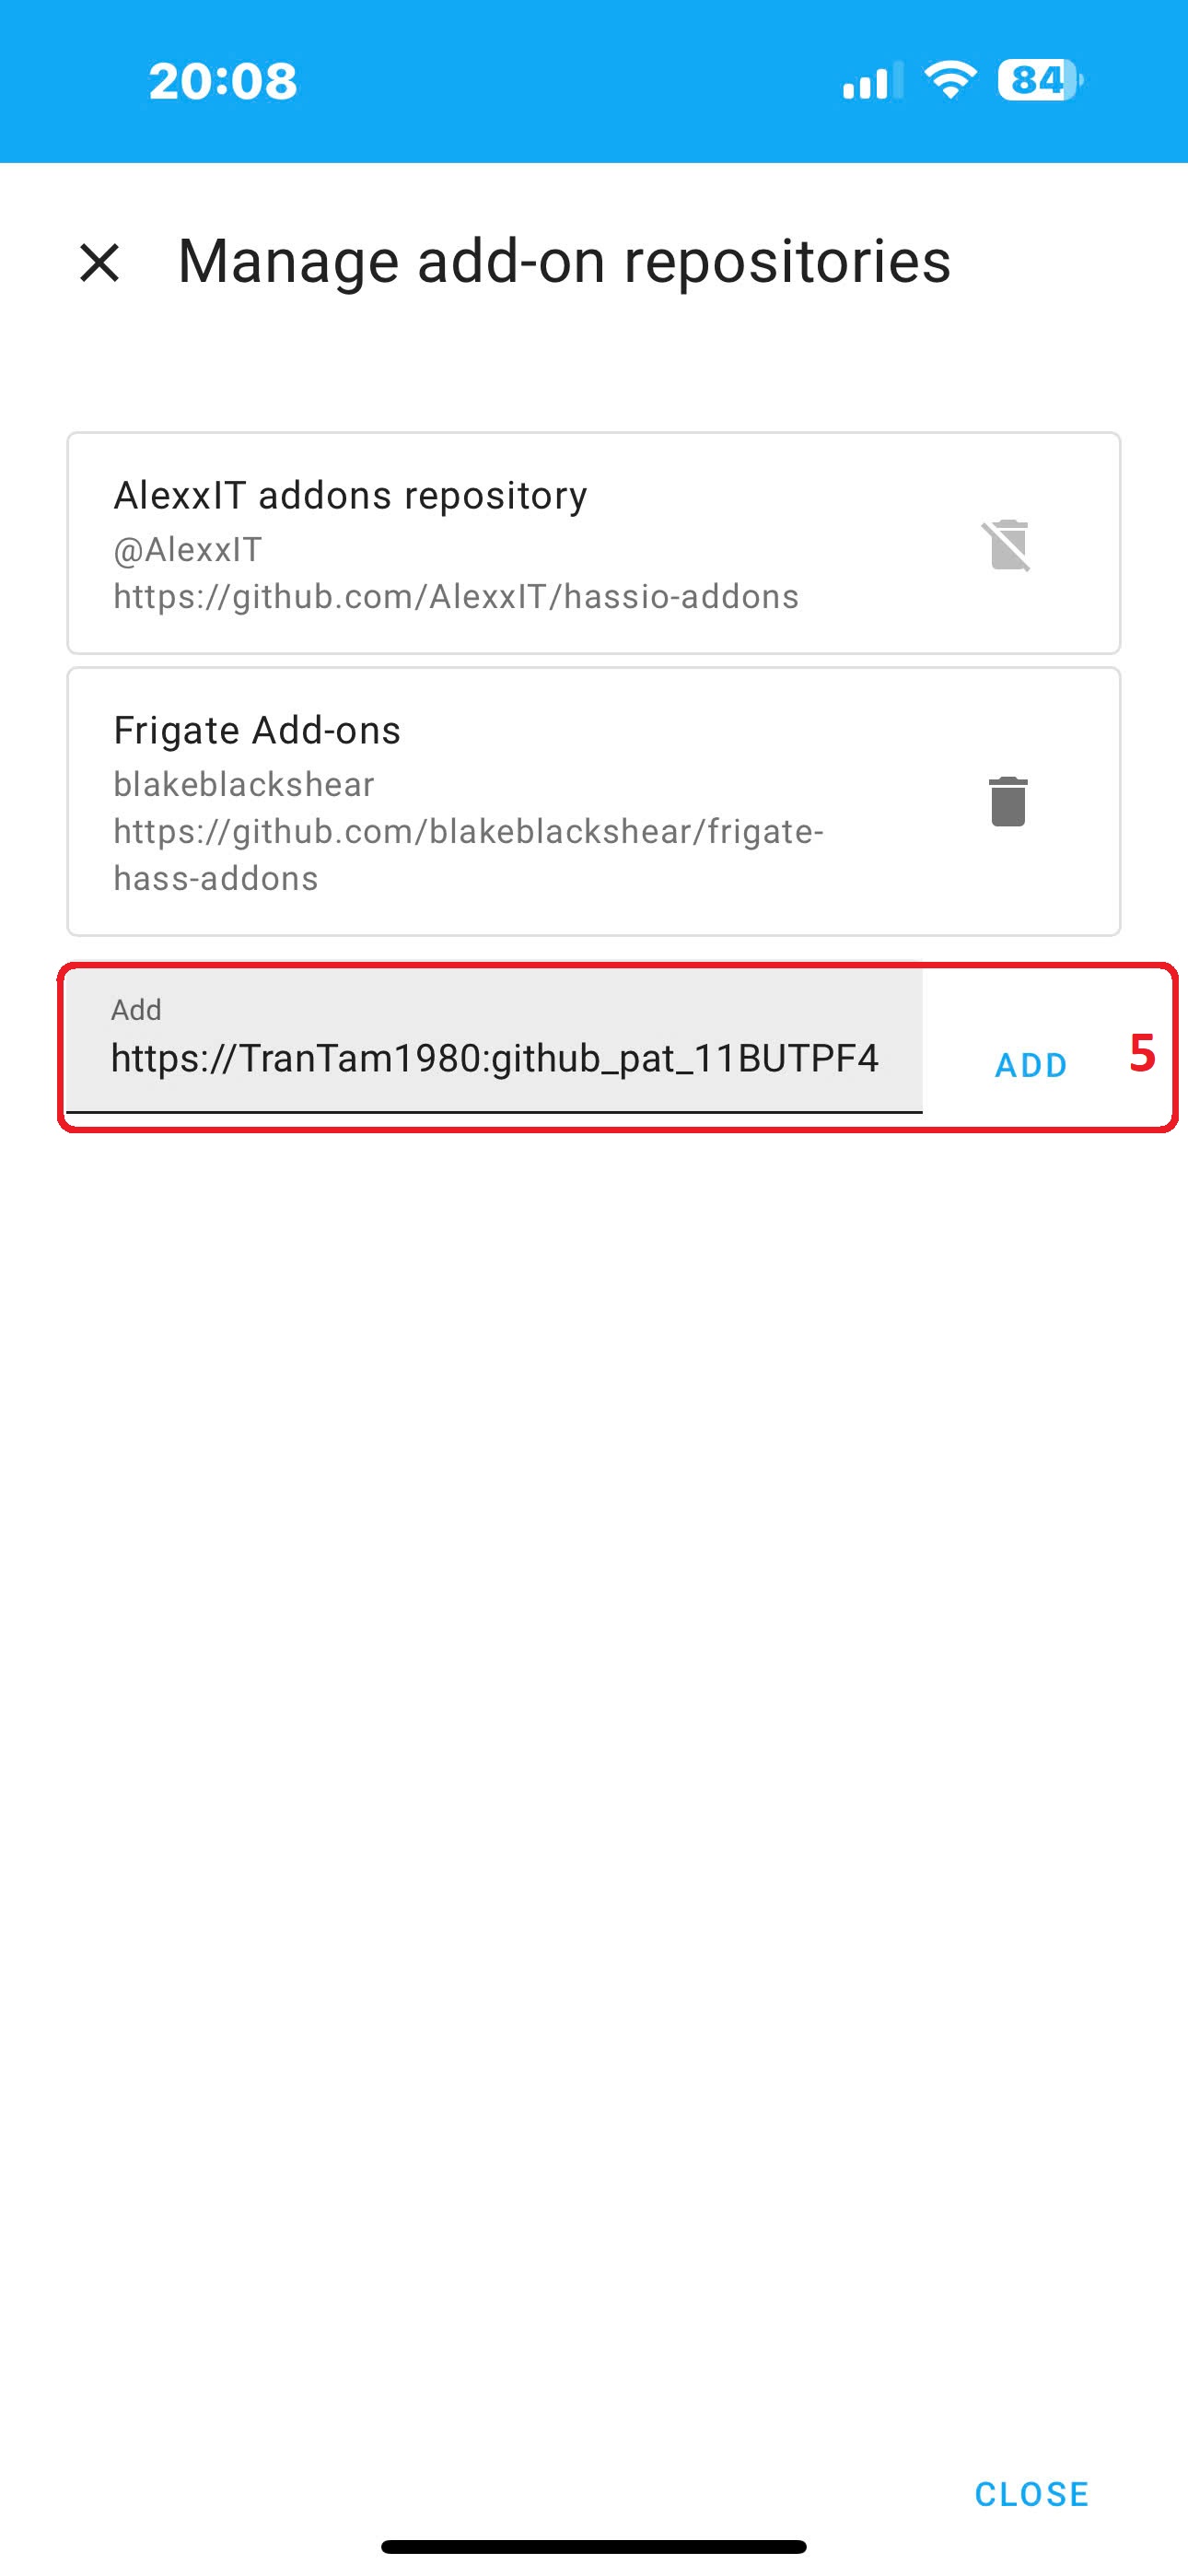
STEP_2. CLICK HERE to copy addon link, paste into Manage add-on repositories and click 'ADD' button.
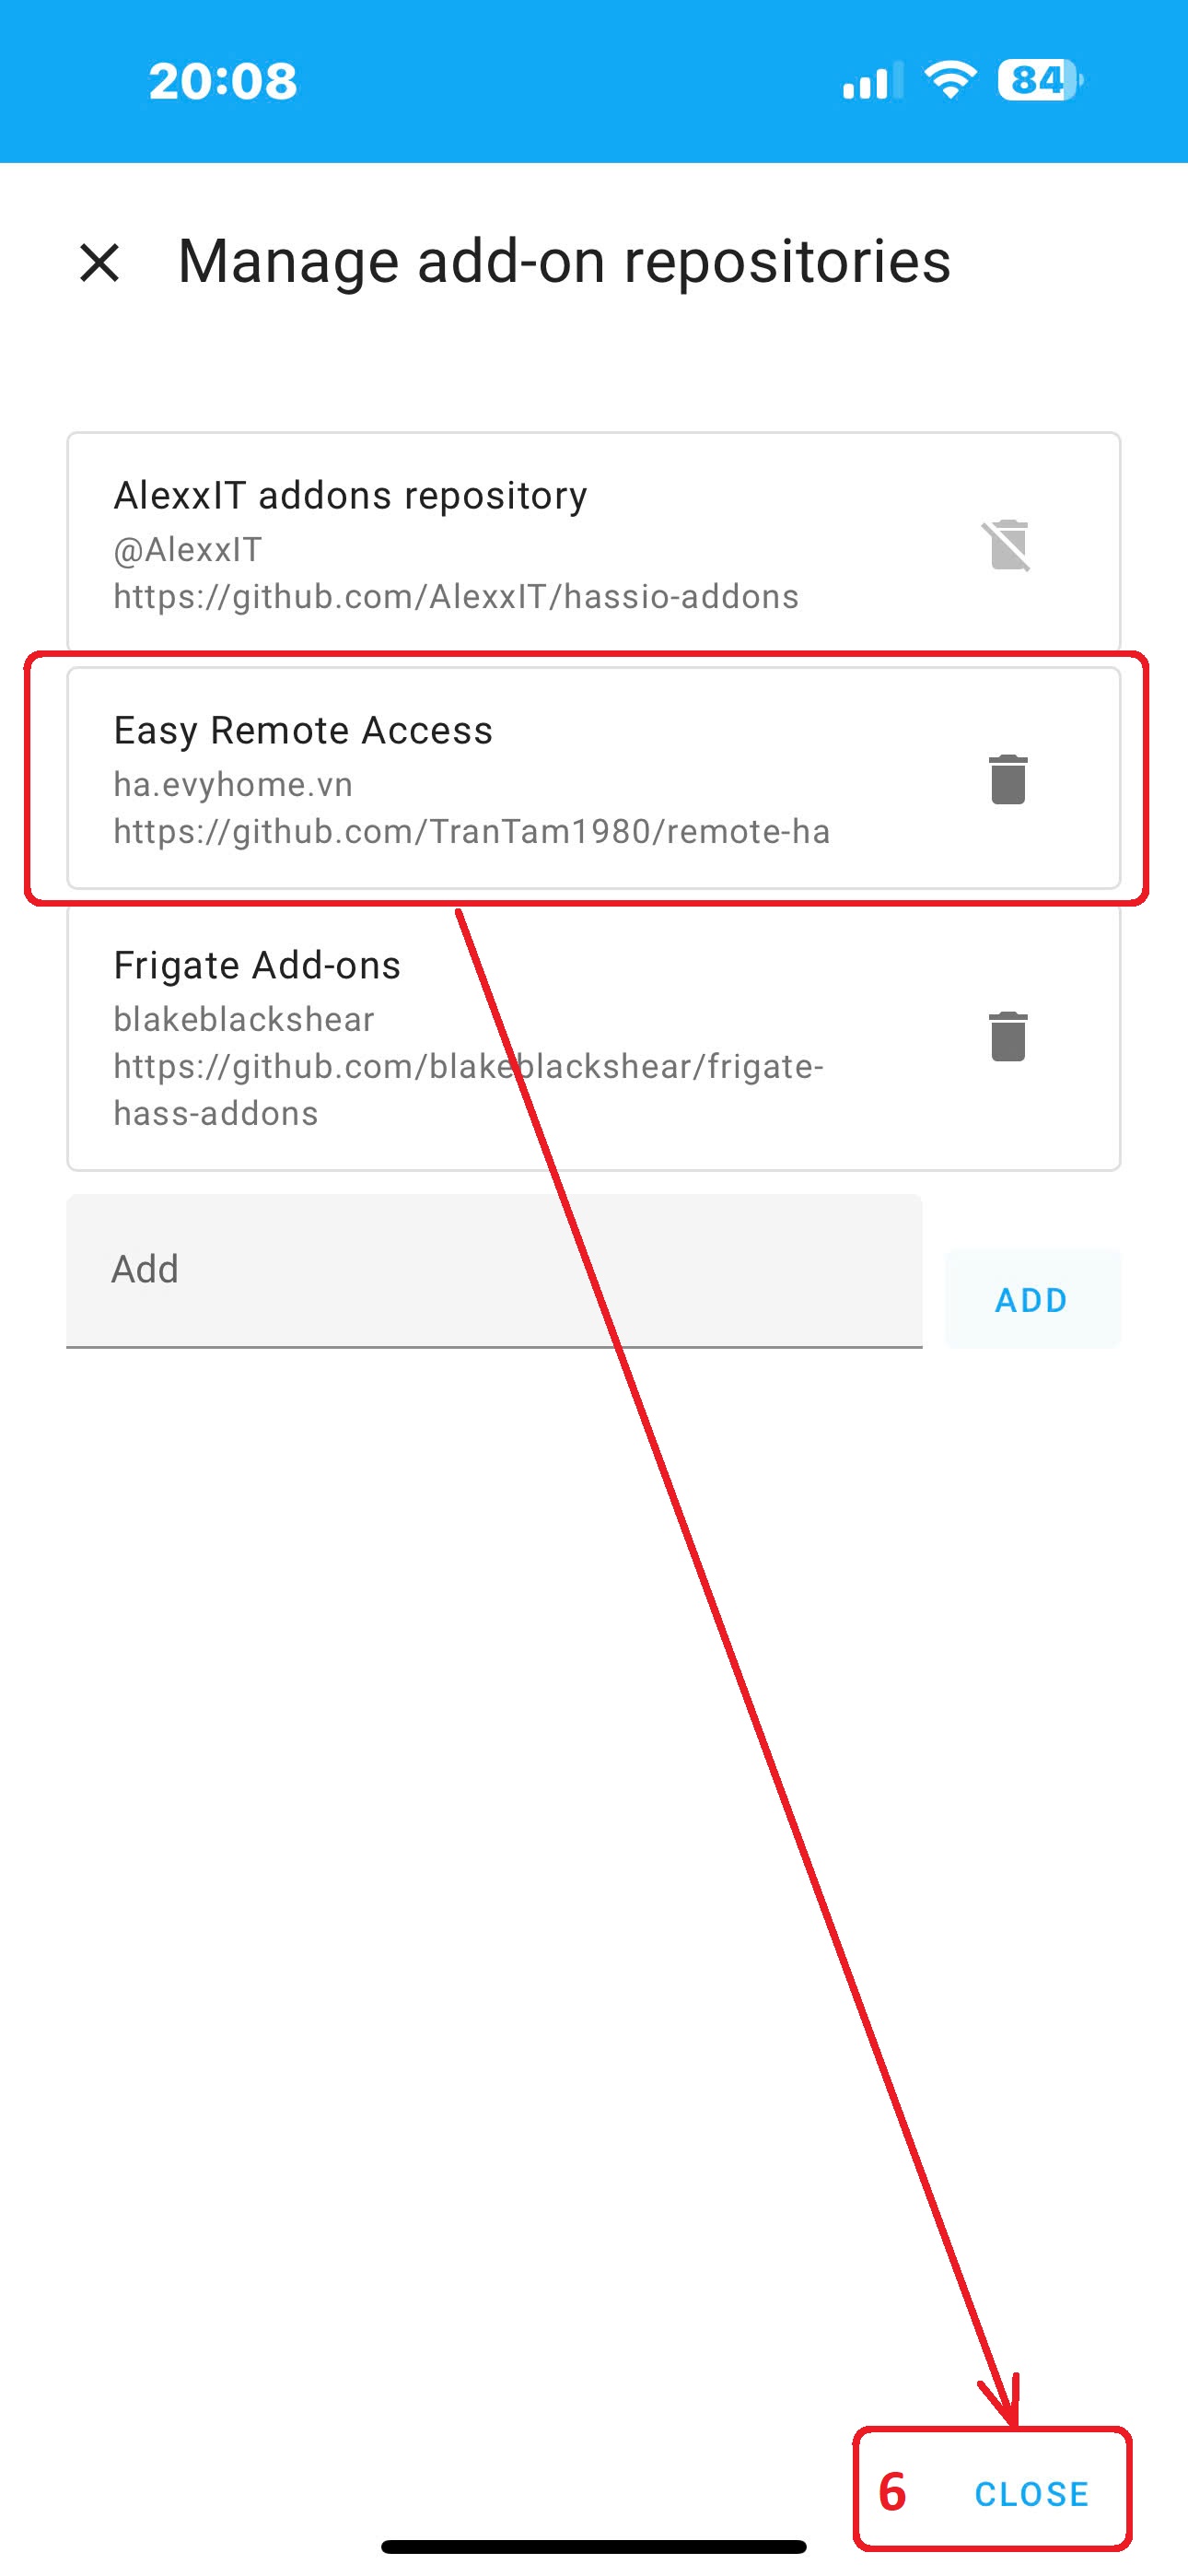
STEP_3. Close the window, swipe down from the top of the screen to refresh the interface, then enter the keyword Easy Remote Access to search for the newly added add-on.
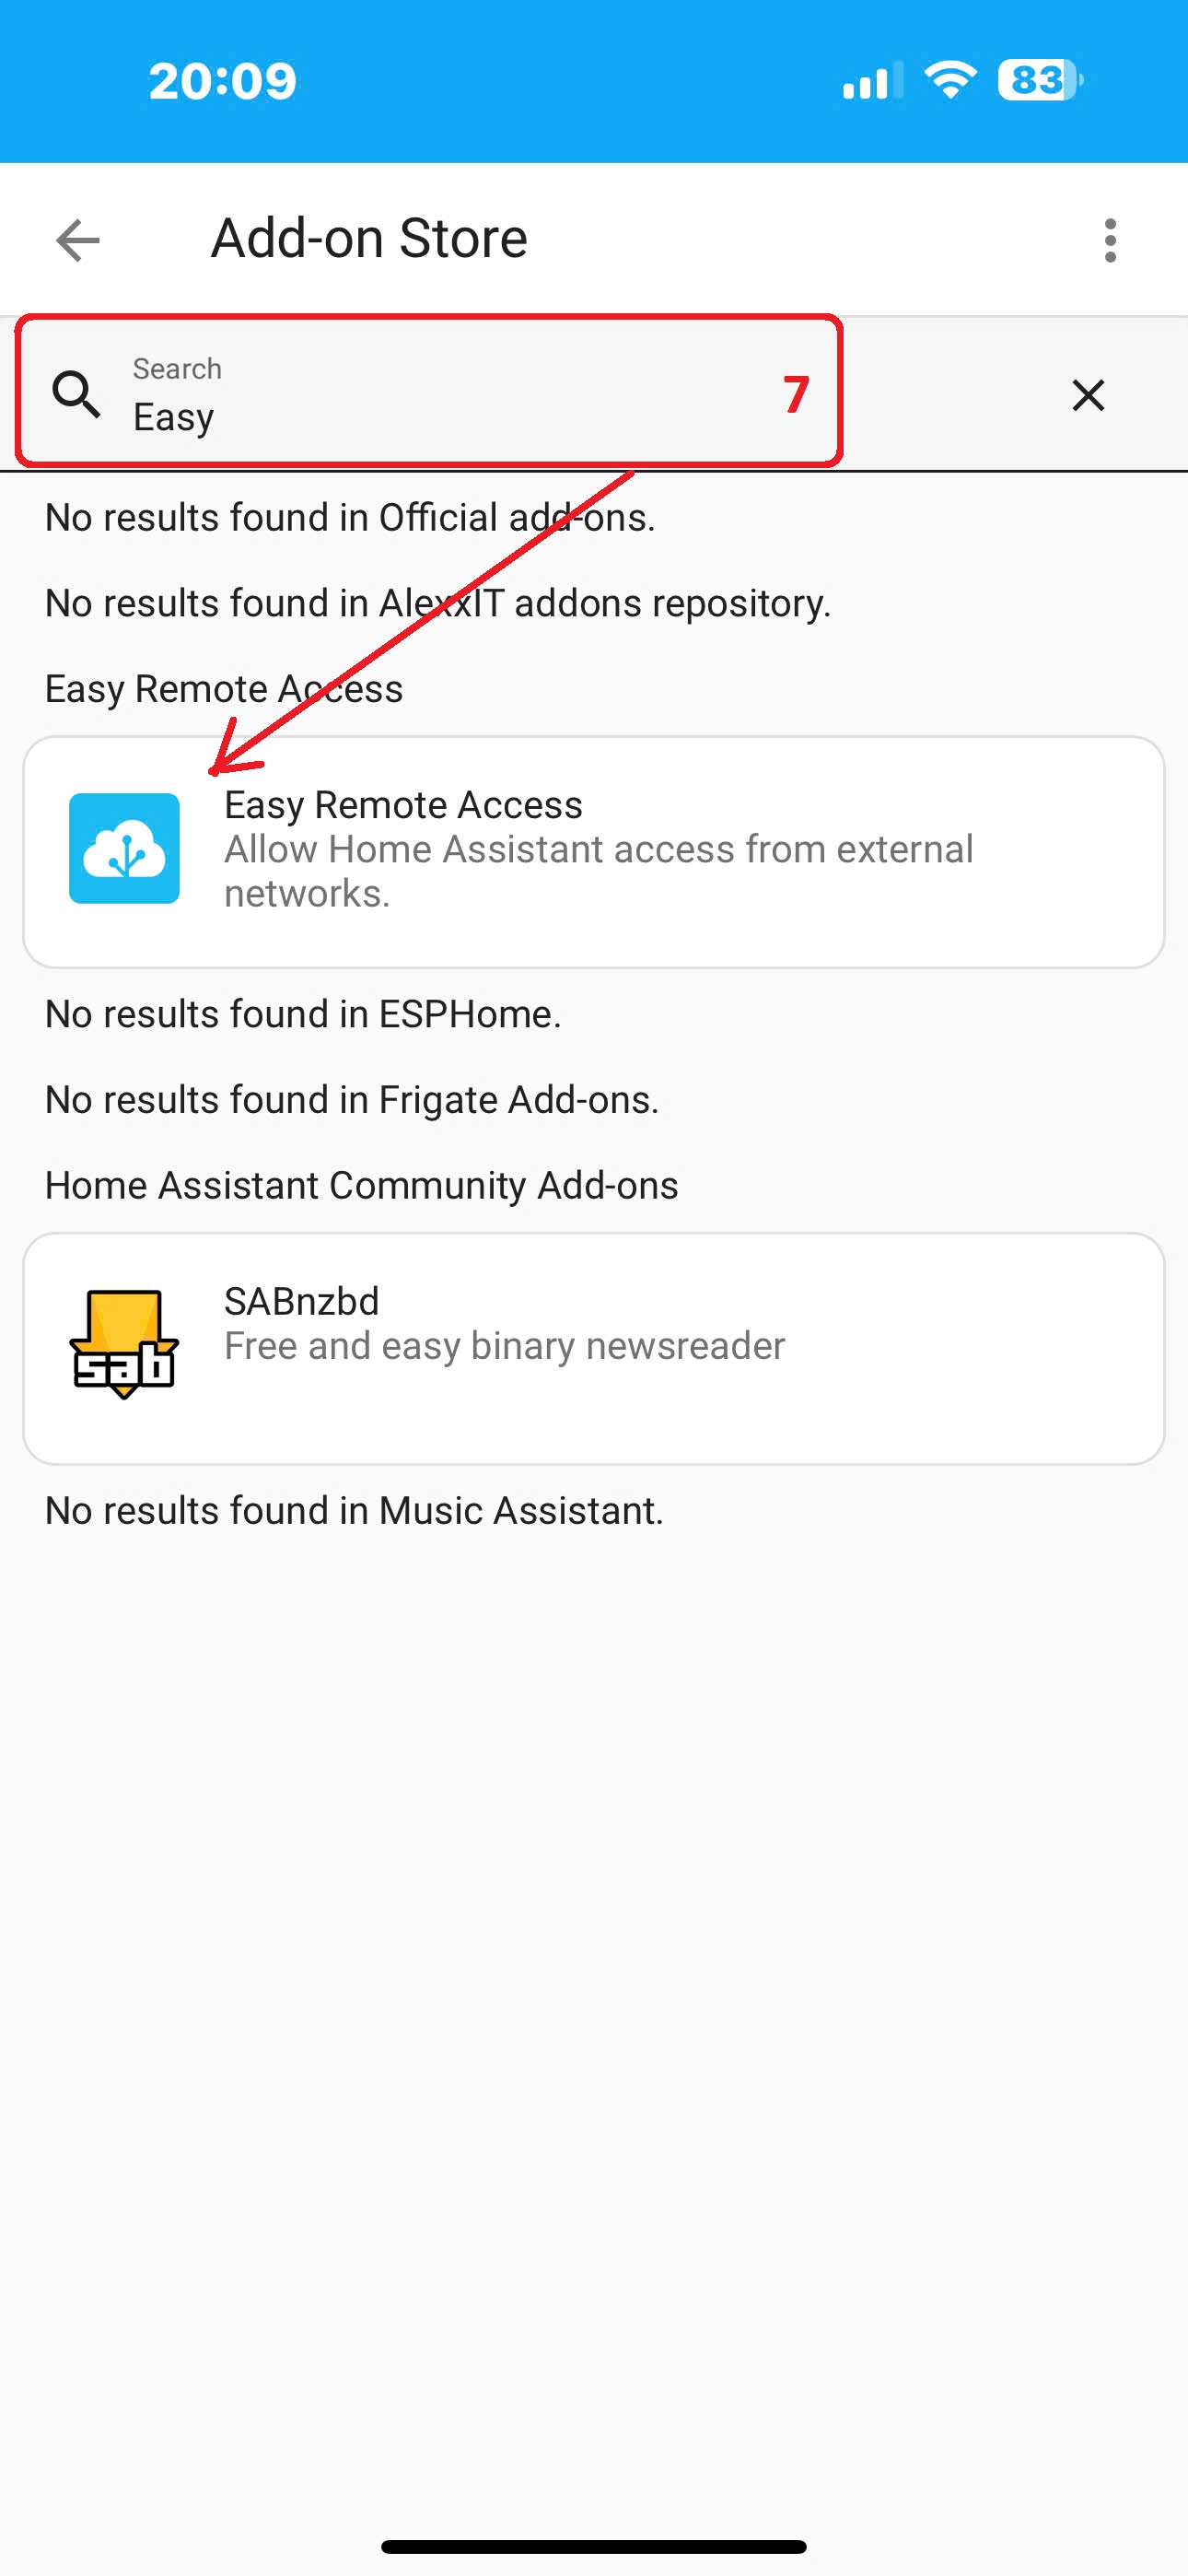
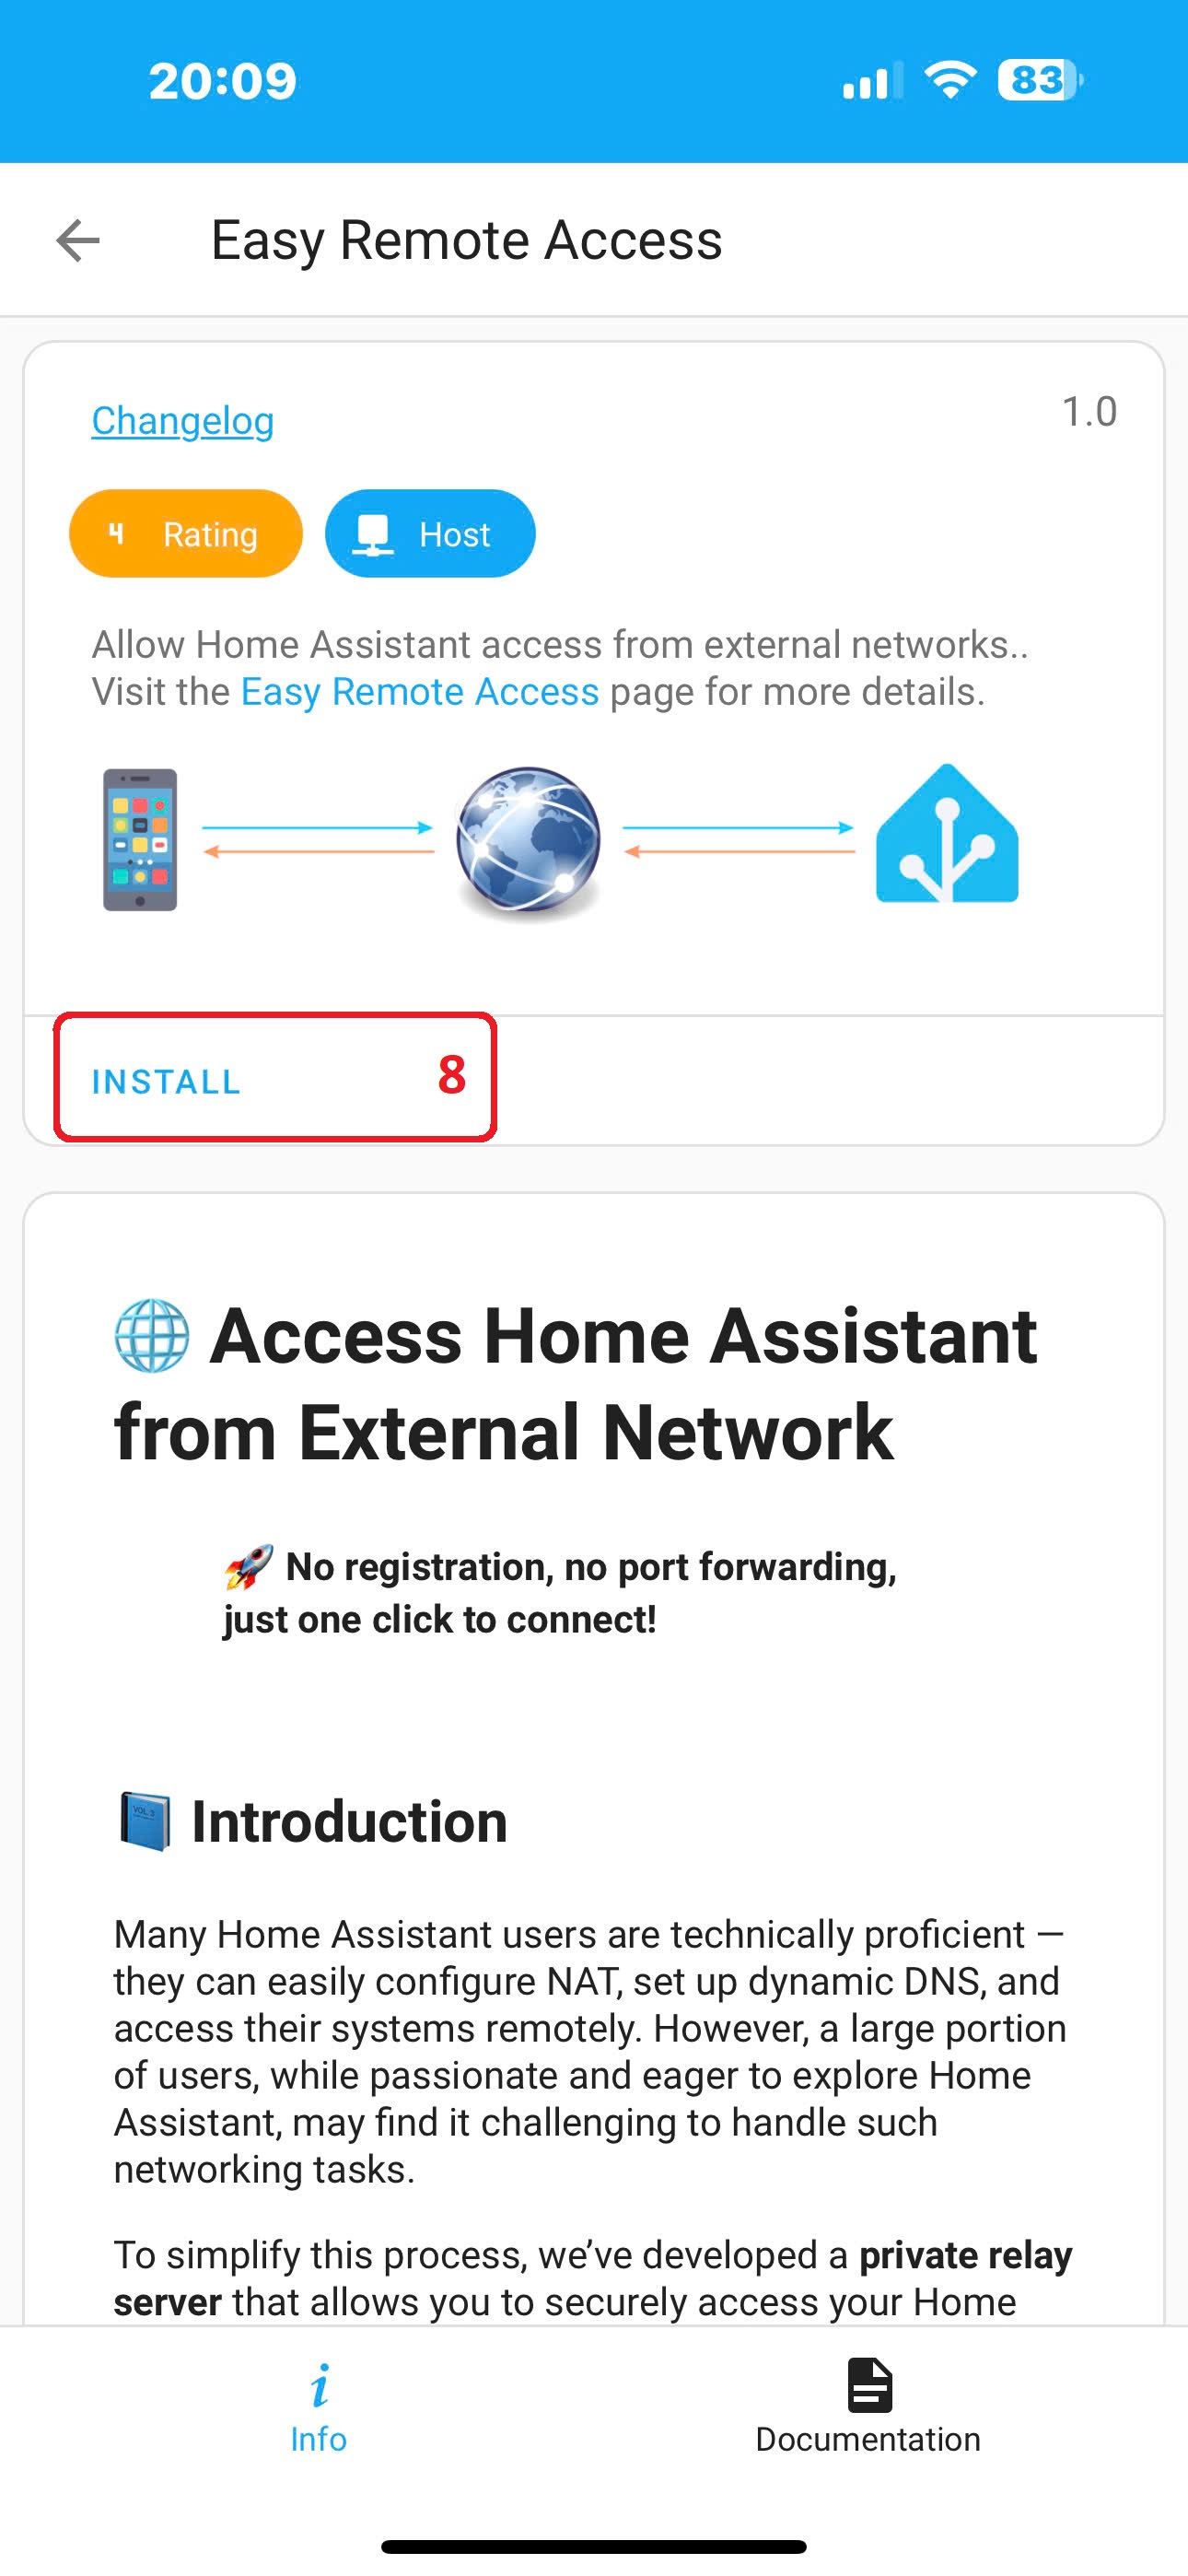
STEP_4. Select the add-on named Easy Remote Access and click Install to proceed with the installation.
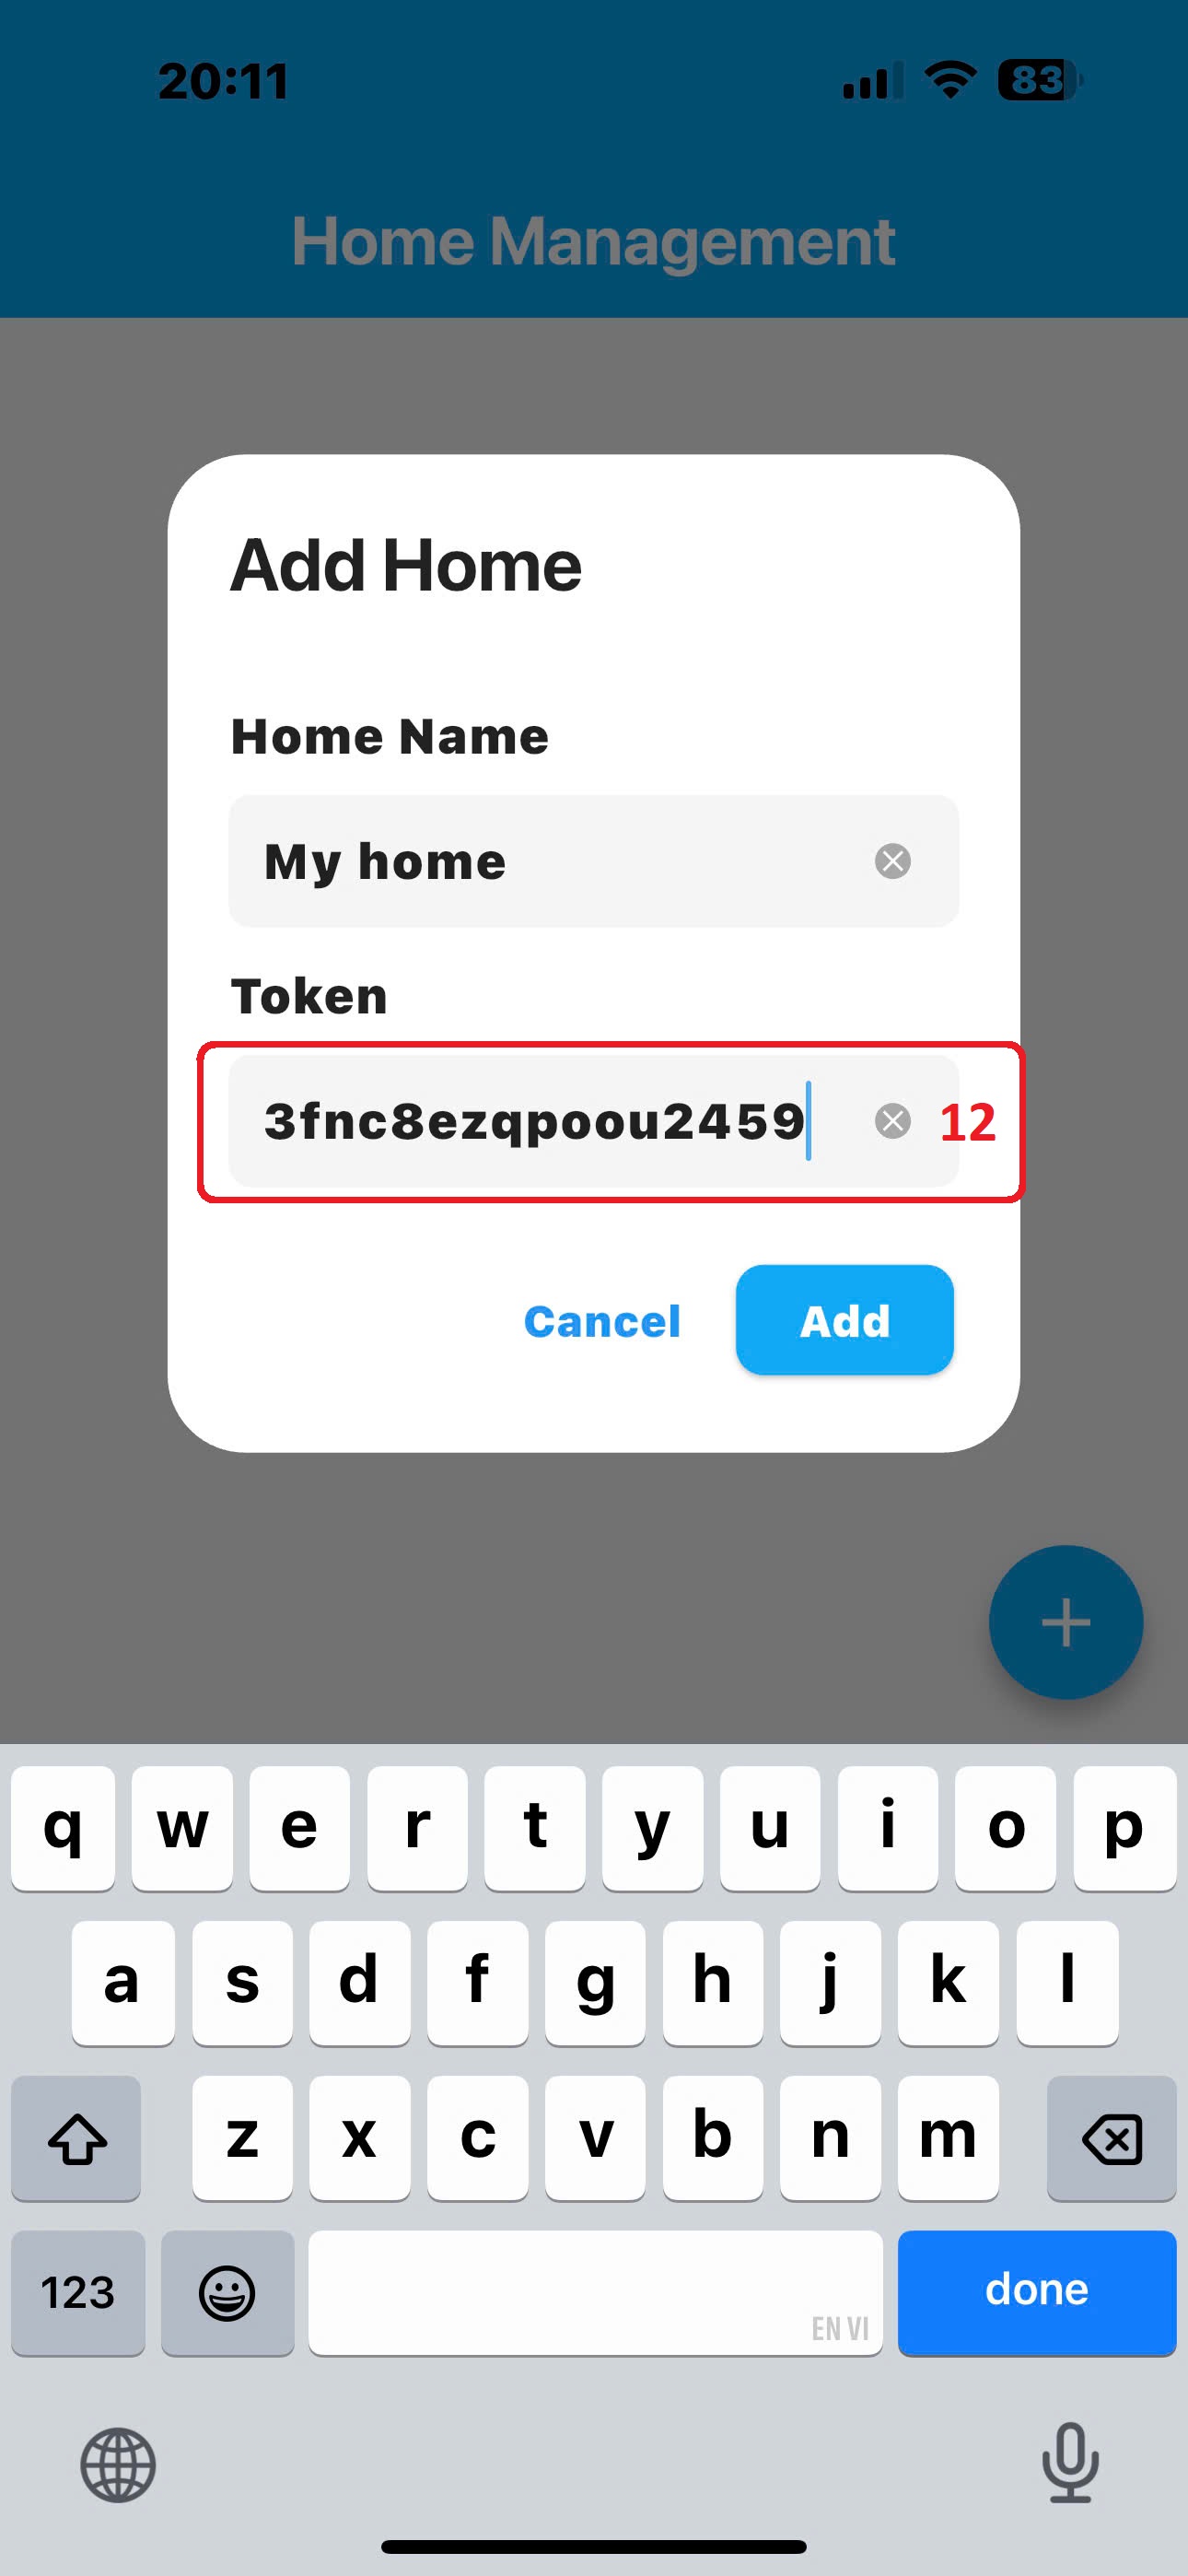
STEP_5. Switch to the Log tab to view the generated token. Open the HA Connect+ app, create a new home, and enter the token information into the token field of the home, then save it.
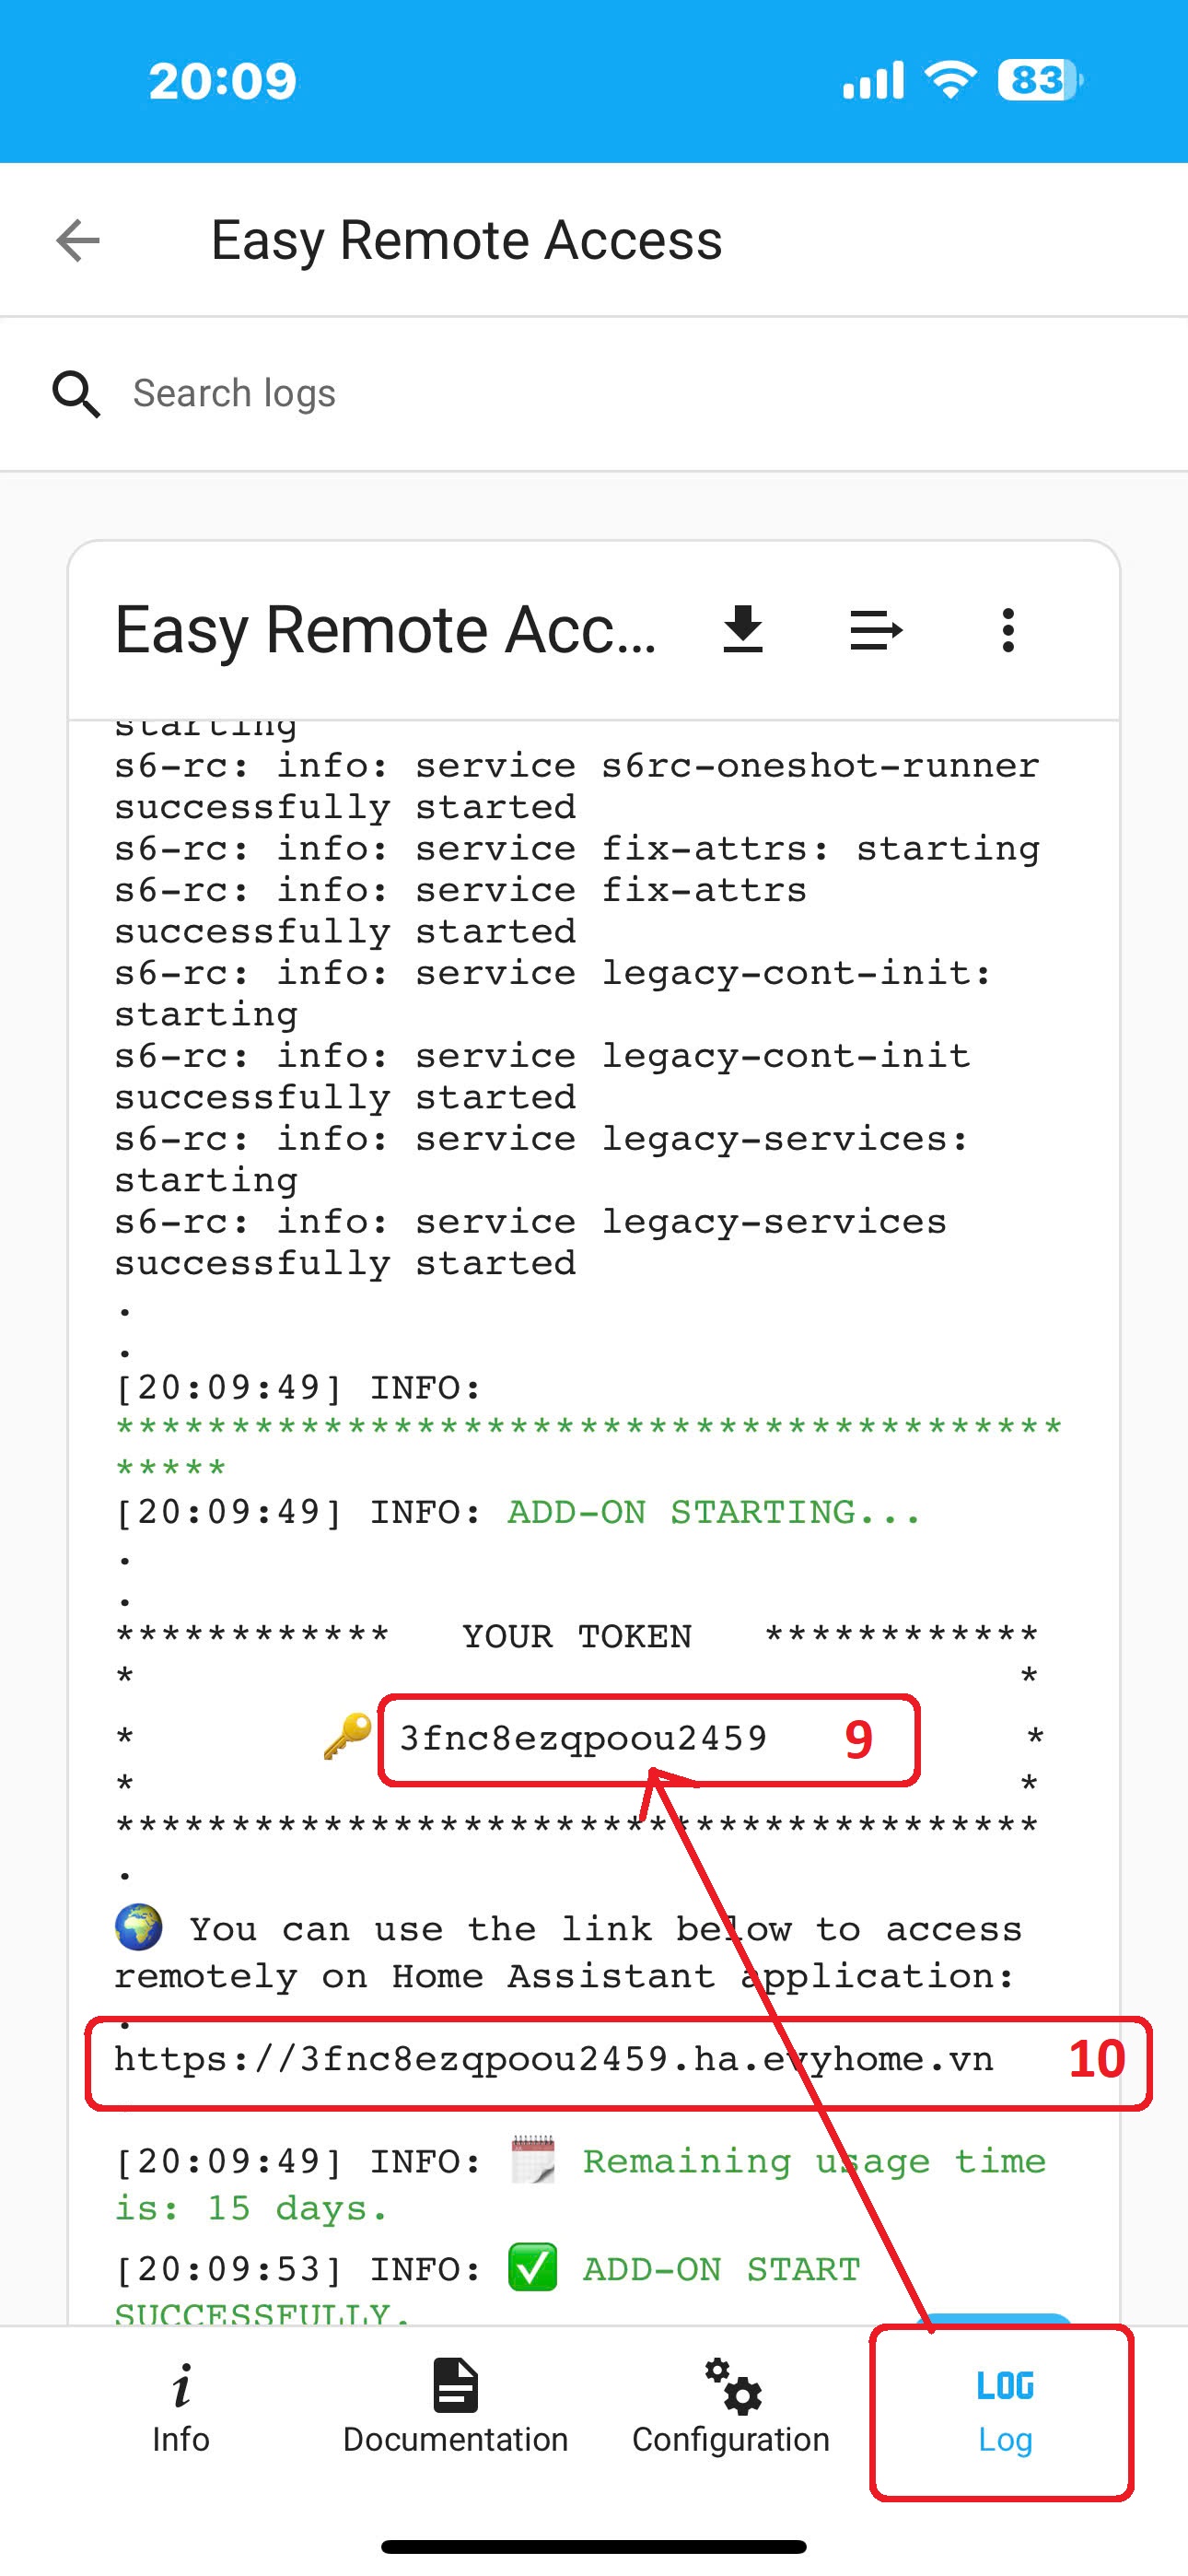
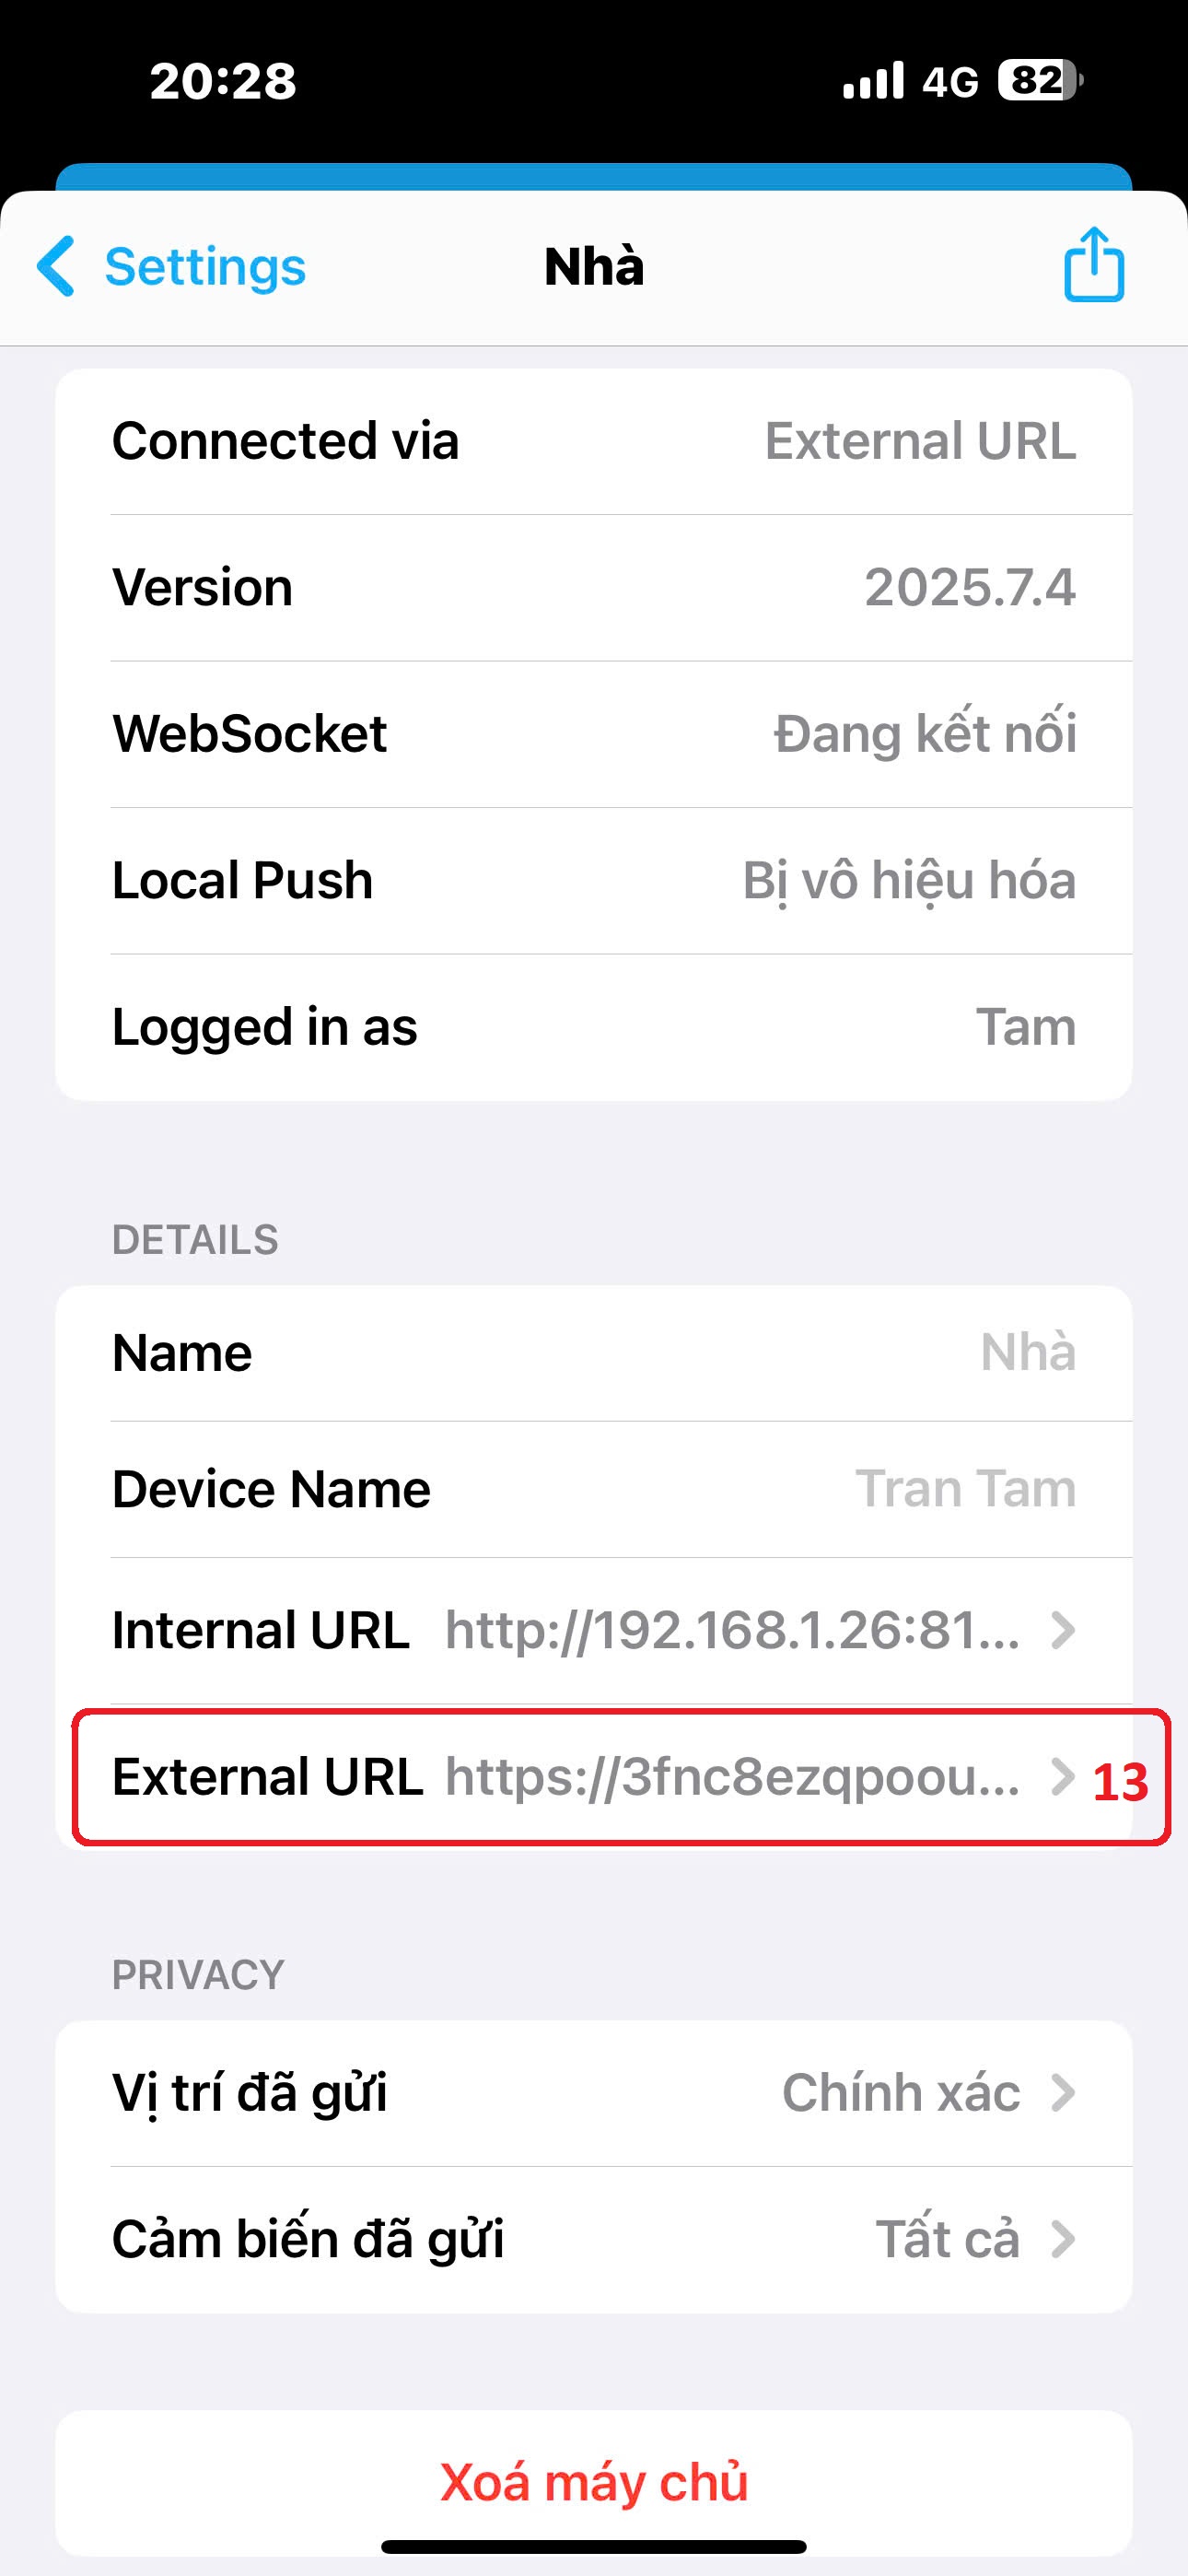
STEP_6. You can use the full URL in the format https:// <_token_> .ha.evyhome.vn and paste it into the External URL field in the Home Assistant app to use it without needing the HA Connect+ app.
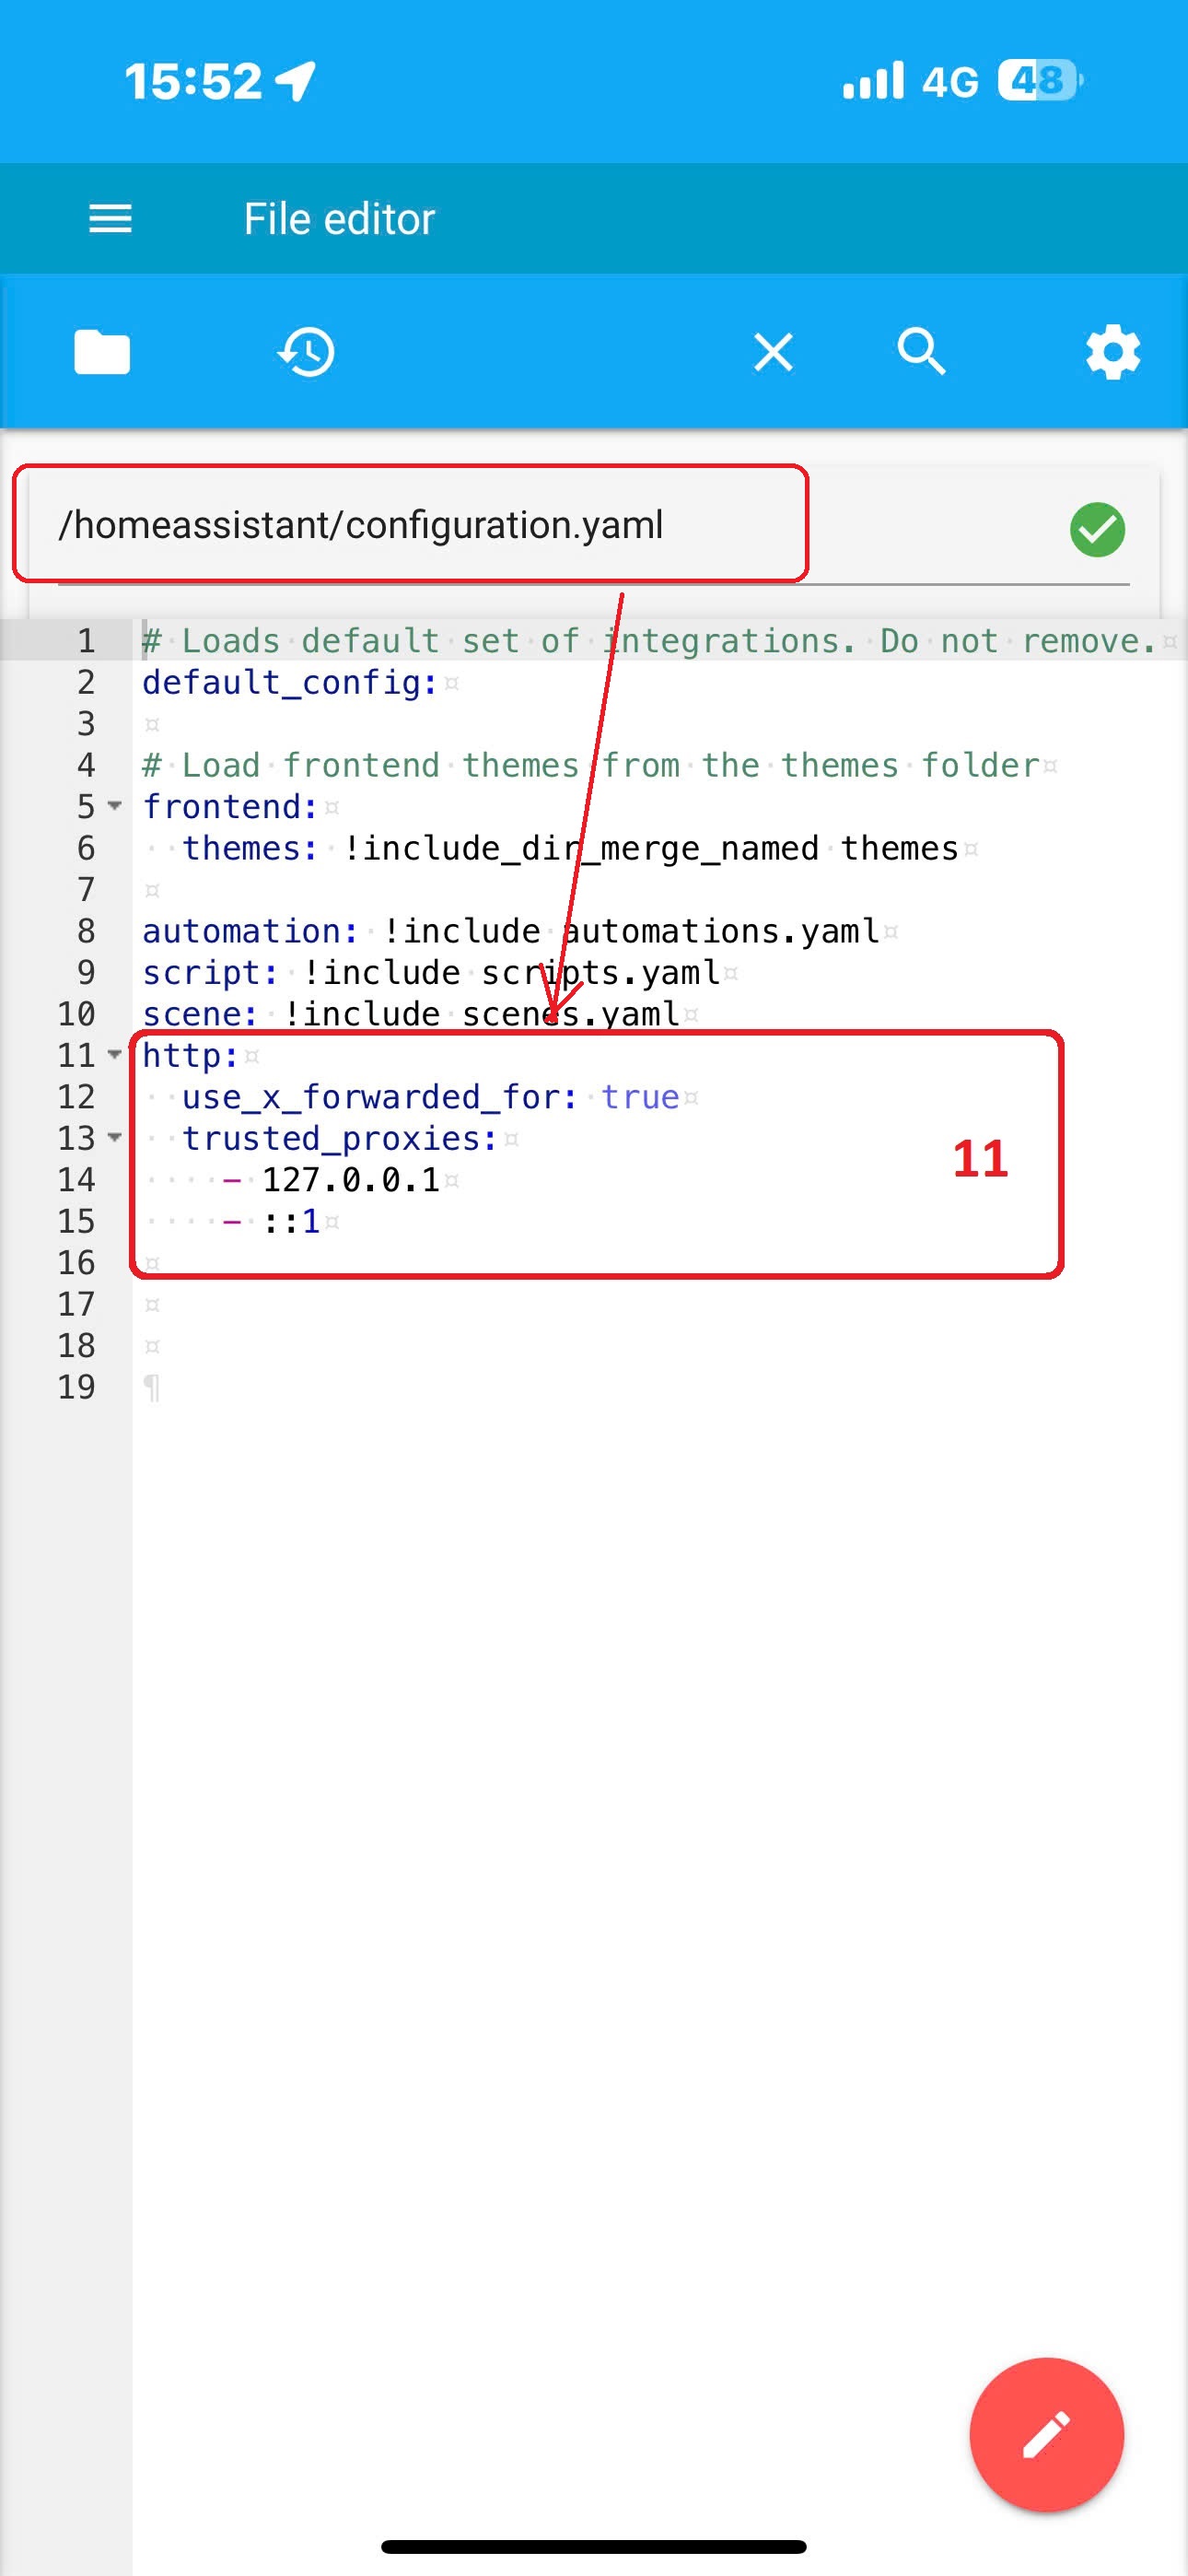
STEP_7. Install the File Editor addon and edit the configuration.yaml file as follows: COPY
http:
  use_x_forwarded_for: true
  trusted_proxies:
    - 127.0.0.1
    - ::1
    - 45.251.115.195
Save configuration.yaml and restart Home Assistant.
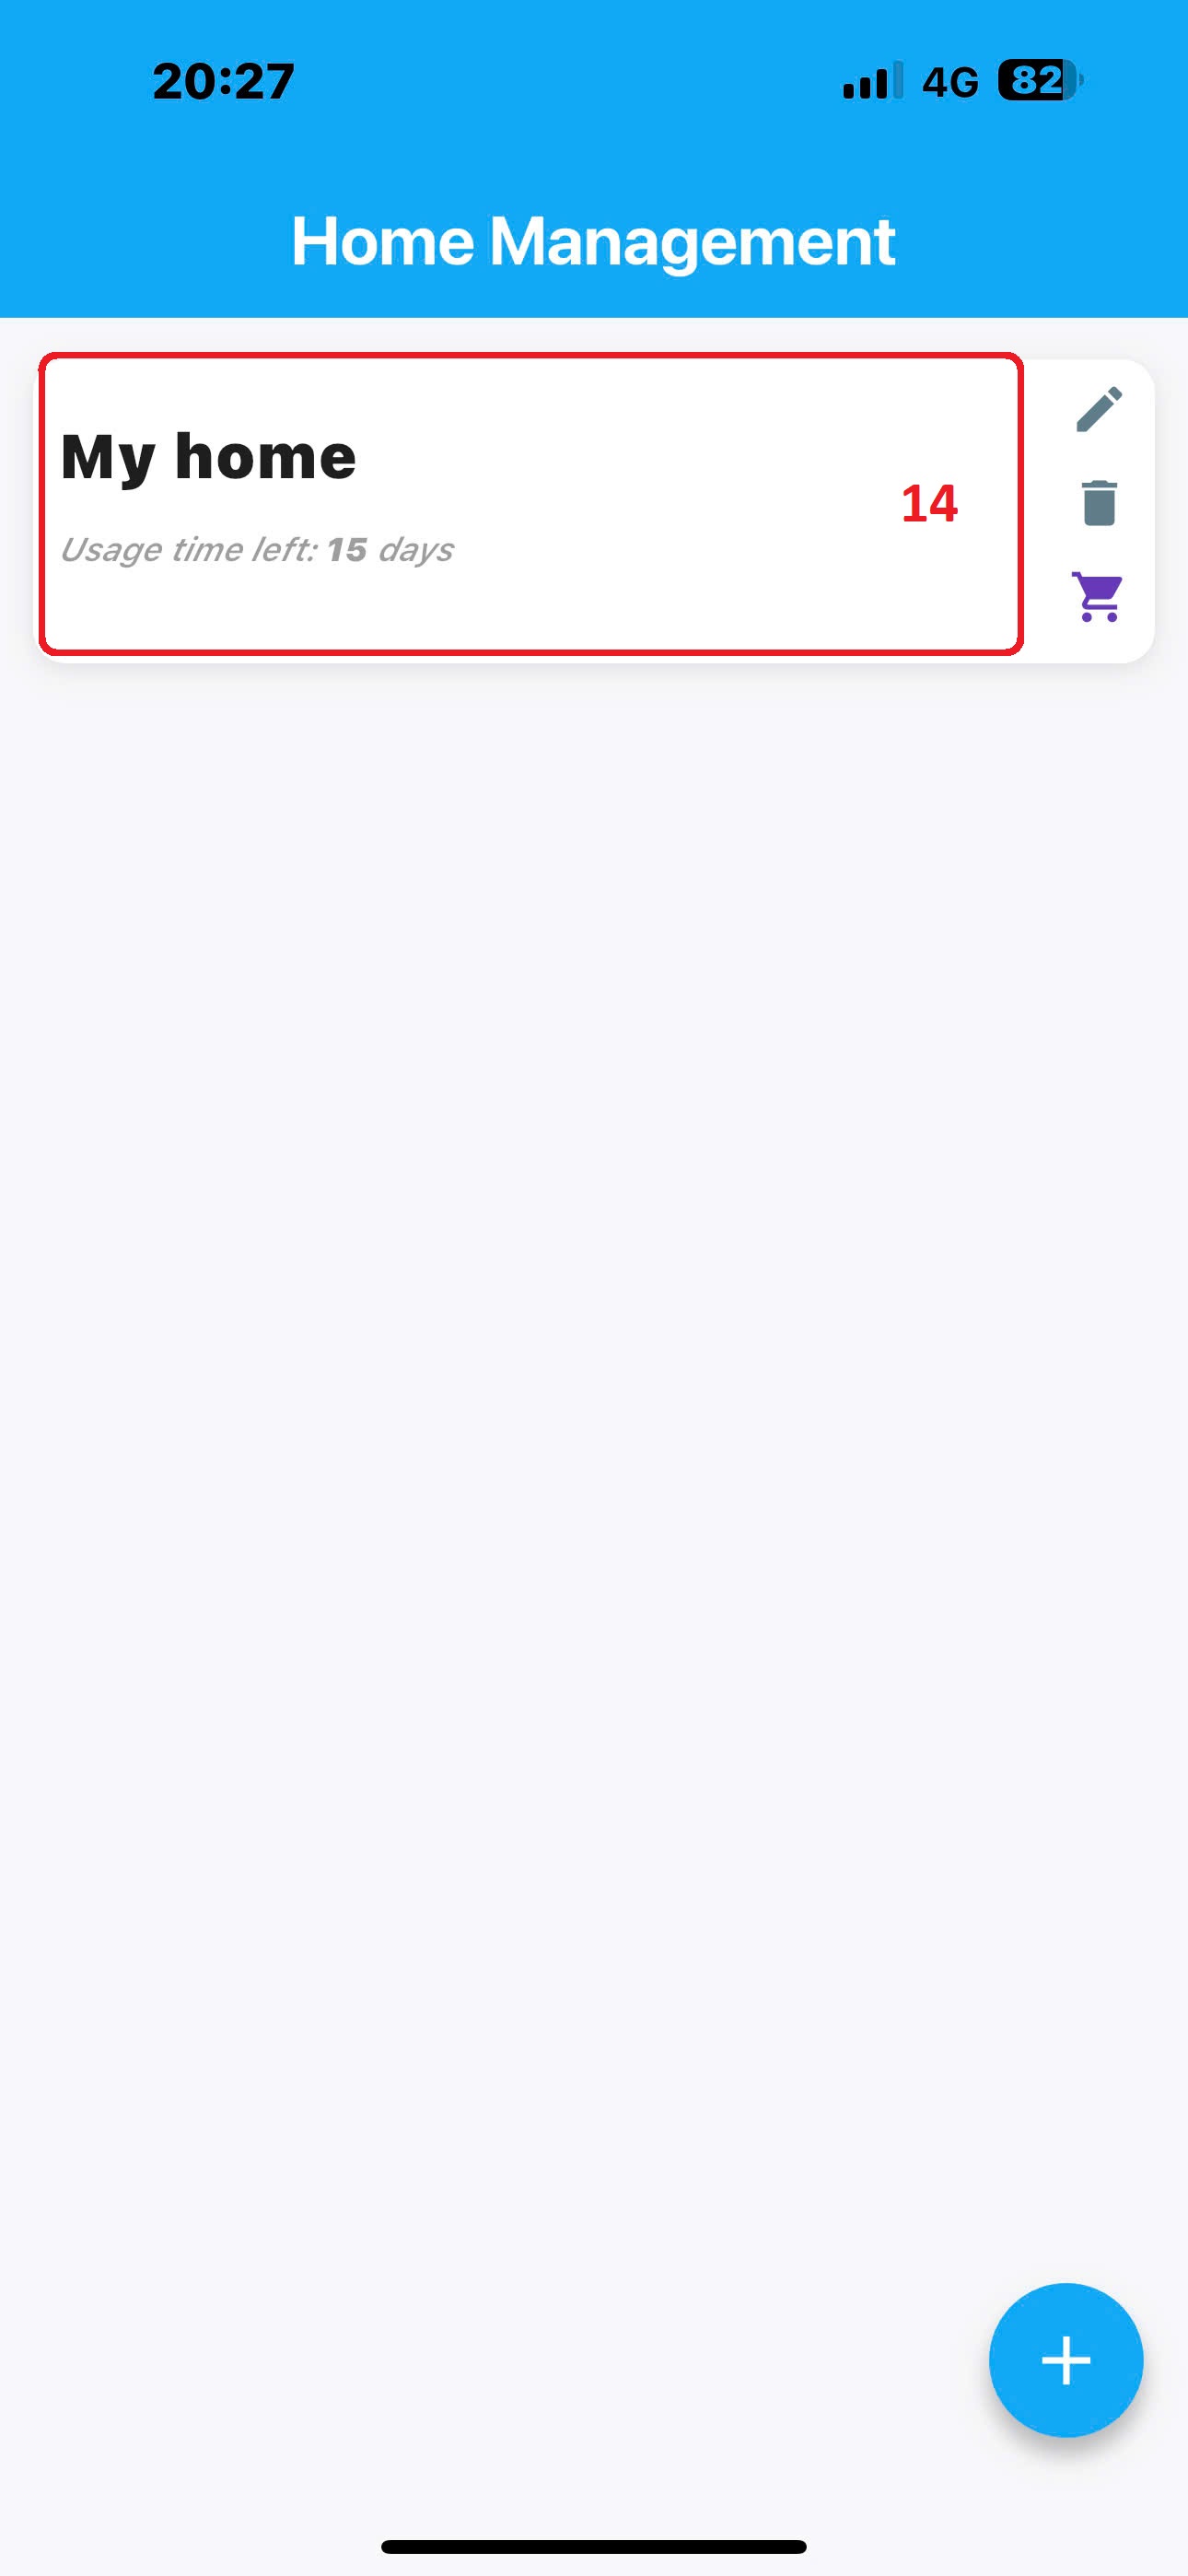
STEP_8. Open HA Connect+ app, click on the home name added in step 5 to start remote control your home.
TUTORIAL VIDEO